Depth Map Batch (DMB) Documentation
Getting Started Guide
As a starting point, here's a quick getting started guide to using Depth Map Batch that covers all the key areas including installation and using key features. If you want to leverage GPU acceleration, please see instructions here.
There are four main steps.
- Install the add-on
- Install the Python library packages using the "Install all Packages" button
- Close Blender entirely and re-open
- Download the Model Weights files here and store locally in a directory
And here's a quick demo of how to generate depth maps.
Download Model Weights Files
If you have any questions on how to use the model weights files, feel free to message me directly or watch this brief video covering that here. You can also watch a video on how to use model weights files here.
Depth Anything V2
Depth Anything V2 Small (home page)
Download the model weights file in the page below:
🔗 URL: https://huggingface.co/depth-anything/Depth-Anything-V2-Small/blob/main/depth_anything_v2_vits.pth
Depth Anything V2 Base (home page)
Download the model weights file in the page below:
🔗 URL: https://huggingface.co/depth-anything/Depth-Anything-V2-Base/blob/main/depth_anything_v2_vitb.pth
Depth Anything V2 Large (home page)
Download the model weights file in the page below:
🔗 URL: https://huggingface.co/depth-anything/Depth-Anything-V2-Large/blob/main/depth_anything_v2_vitl.pth
MiDaS
MiDaS 3.1 Large (home page)
🔗 URL: https://github.com/isl-org/MiDaS/releases/download/v3_1/dpt_beit_large_512.pt
MiDaS 3.0 Large (home page)
Rename dpt_large-midas-2f21e586.pt to midas_dpt_large.pth before use.
🔗 URL: https://github.com/intel-isl/DPT/releases/download/1_0/dpt_large-midas-2f21e586.pt
Depth Pro
Depth Pro (home page)
🔗 URL: https://ml-site.cdn-apple.com/models/depth-pro/depth_pro.pt
Very large file at almost 2GB
Video Tutorials
| Title | Description | Video Link |
|---|---|---|
| Quick Getting Started Guide | A quick guide to help you get started. | Quick Getting Started Guide (click here) |
| Playlist of Tutorials | Here's where you can go to see all the latest tutorials. | All Tutorials (click here) |
| Installing the add-on | Steps to install the add-on. | Installing add-on (click here) |
| Installing dependencies | Guide to installing necessary dependencies. | Installing dependencies (click here) |
| Referencing model weights | How to reference the model weights file. | How to reference model weights file (click here) |
| Depth Map Styles | Explanation of using Depth Map Styles. | Using Depth Map Styles (click here) |
| Uninstalling Python packages | Steps to uninstall Python packages. | Uninstalling (click here) |
Install Add-On
Follow these steps to install Depth Map Batch in Blender:
- Open Blender
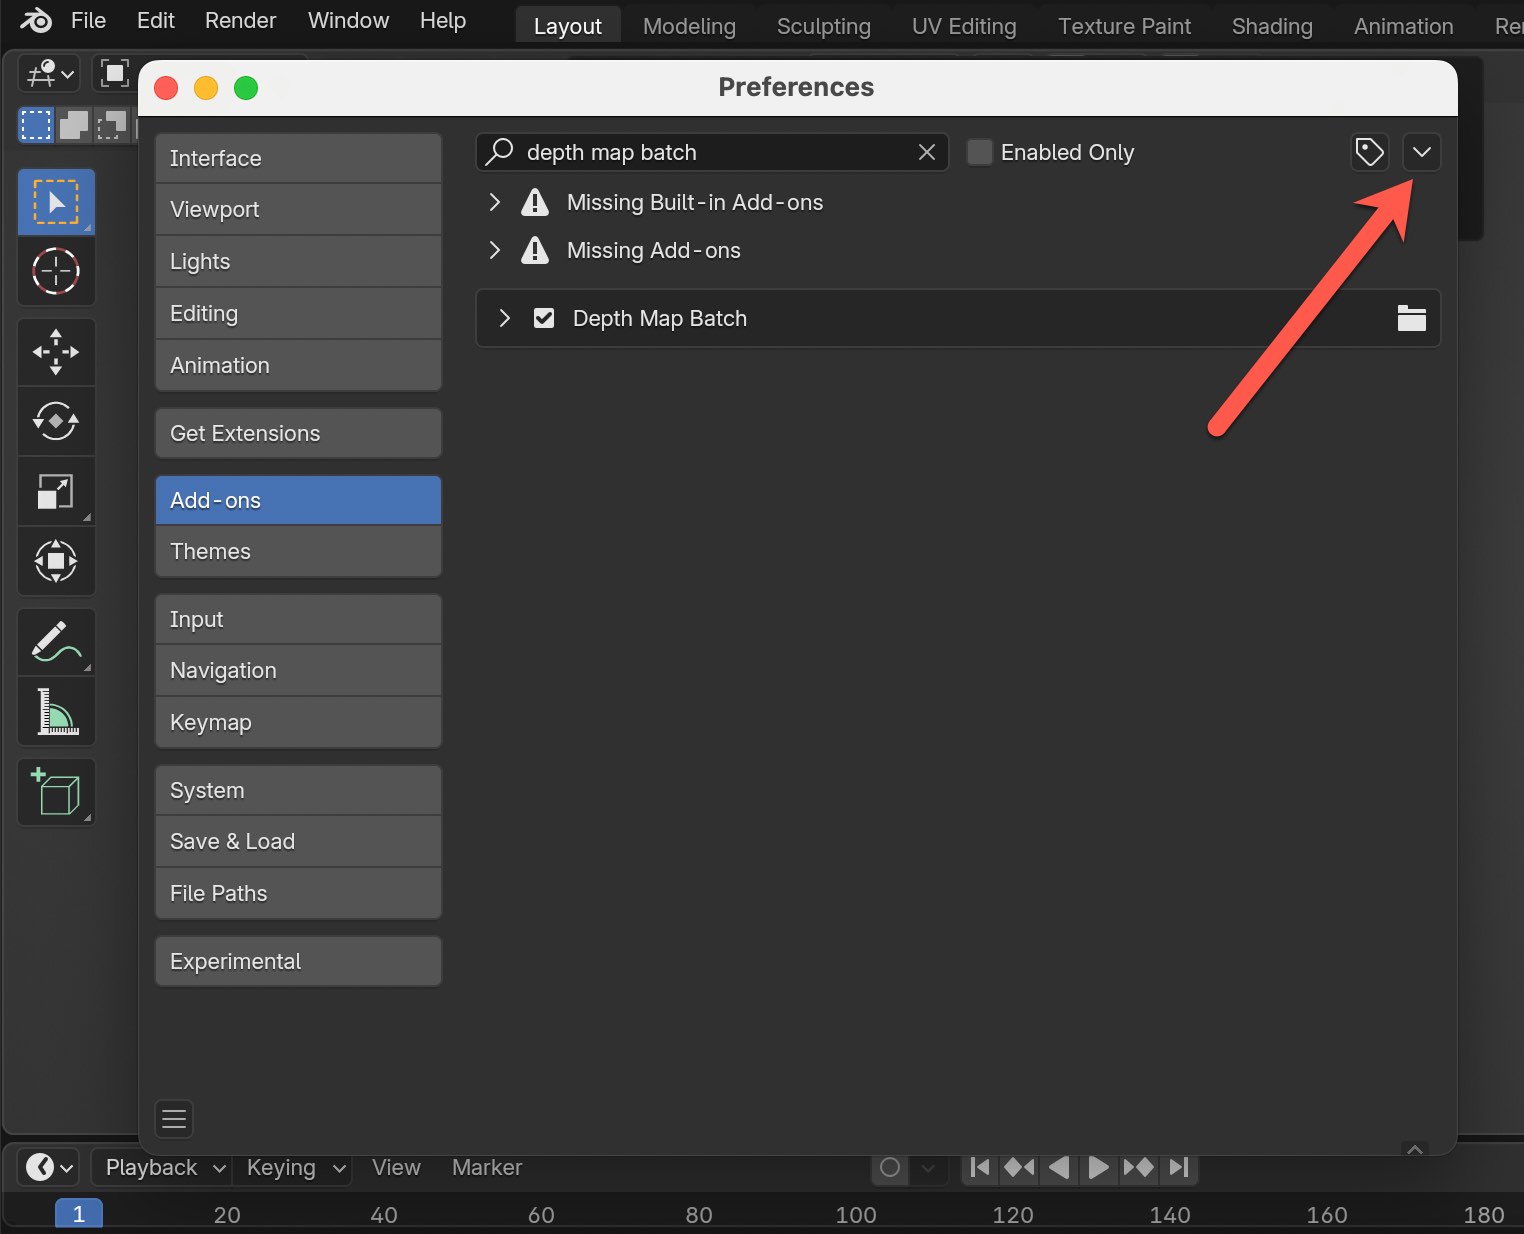
- Go to Edit > Preferences.
- Select the Add-ons tab.
- Click the Install from Disk in the dropdown icon at the top right.
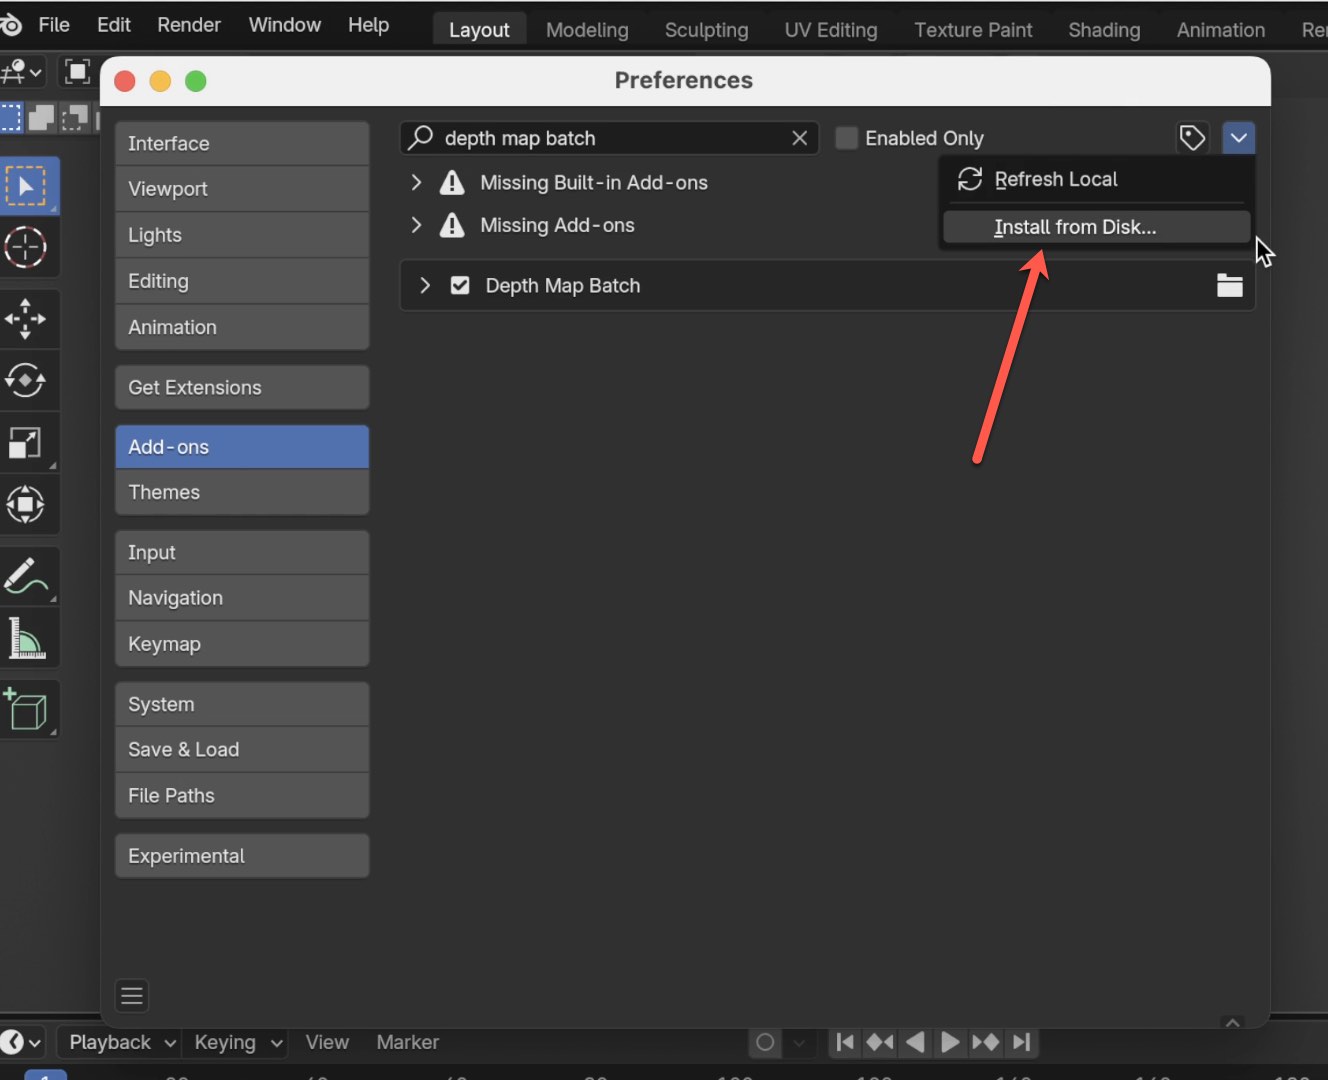
Navigate to and select the downloaded addon ZIP file, then click Install Add-on. There is one version for Windows and a separate version for Mac/Linux, so make sure to choose the right version for your operating system.
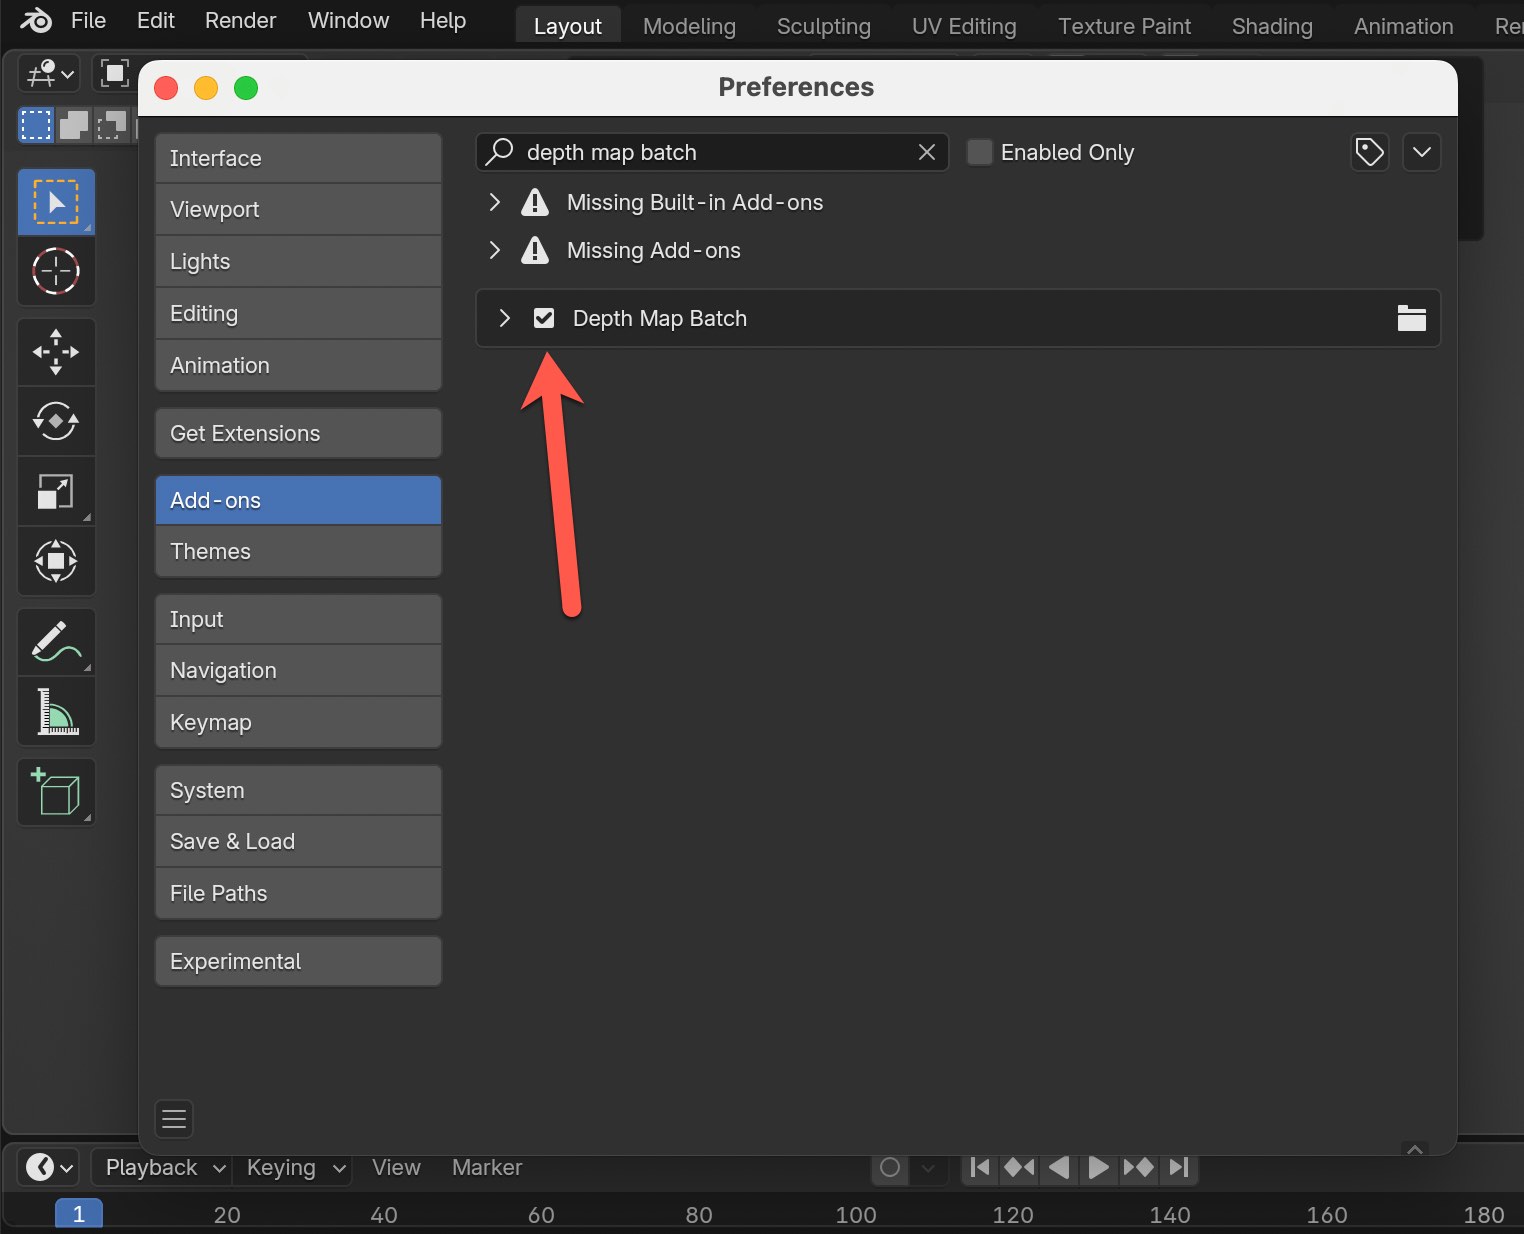
In the list of add-ons, check the box next to your addon's name to enable it.
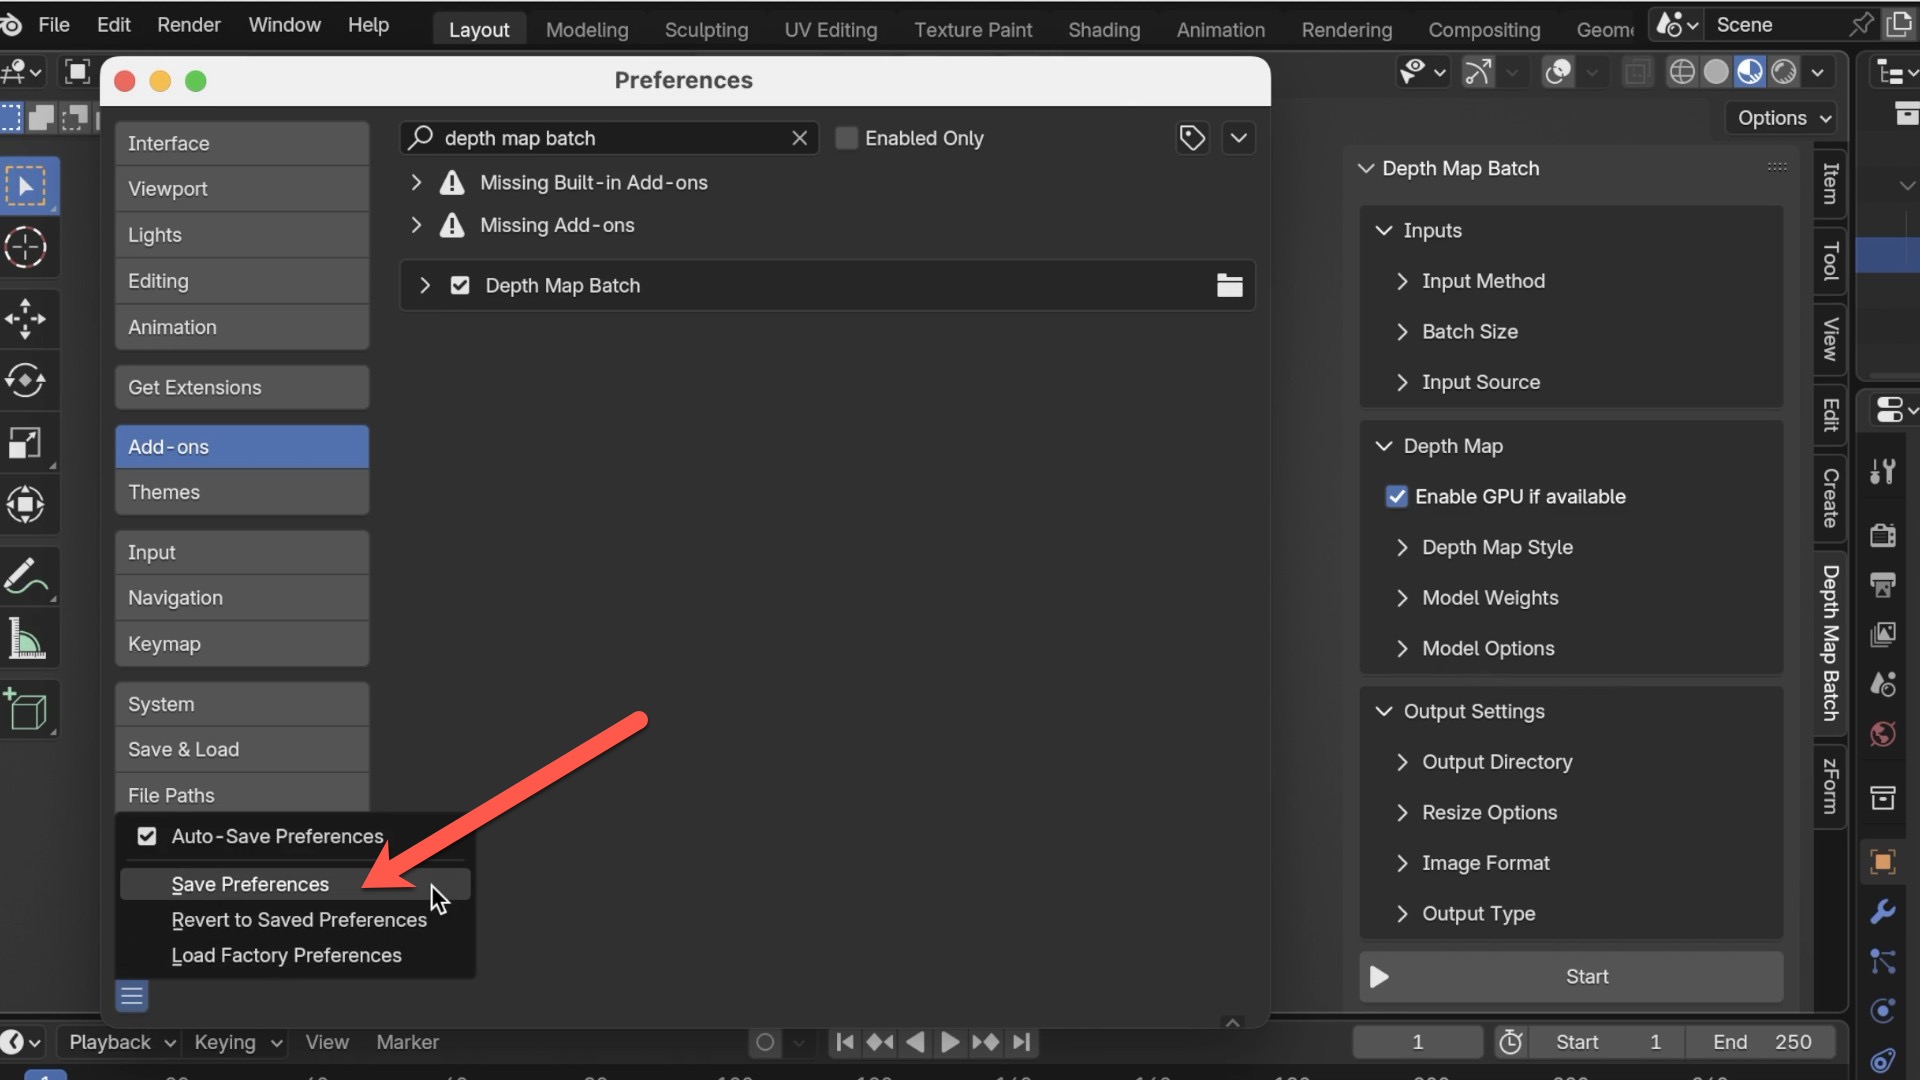
(Optional) Click Save Preferences to keep the addon enabled for future sessions.
Install Python Packages
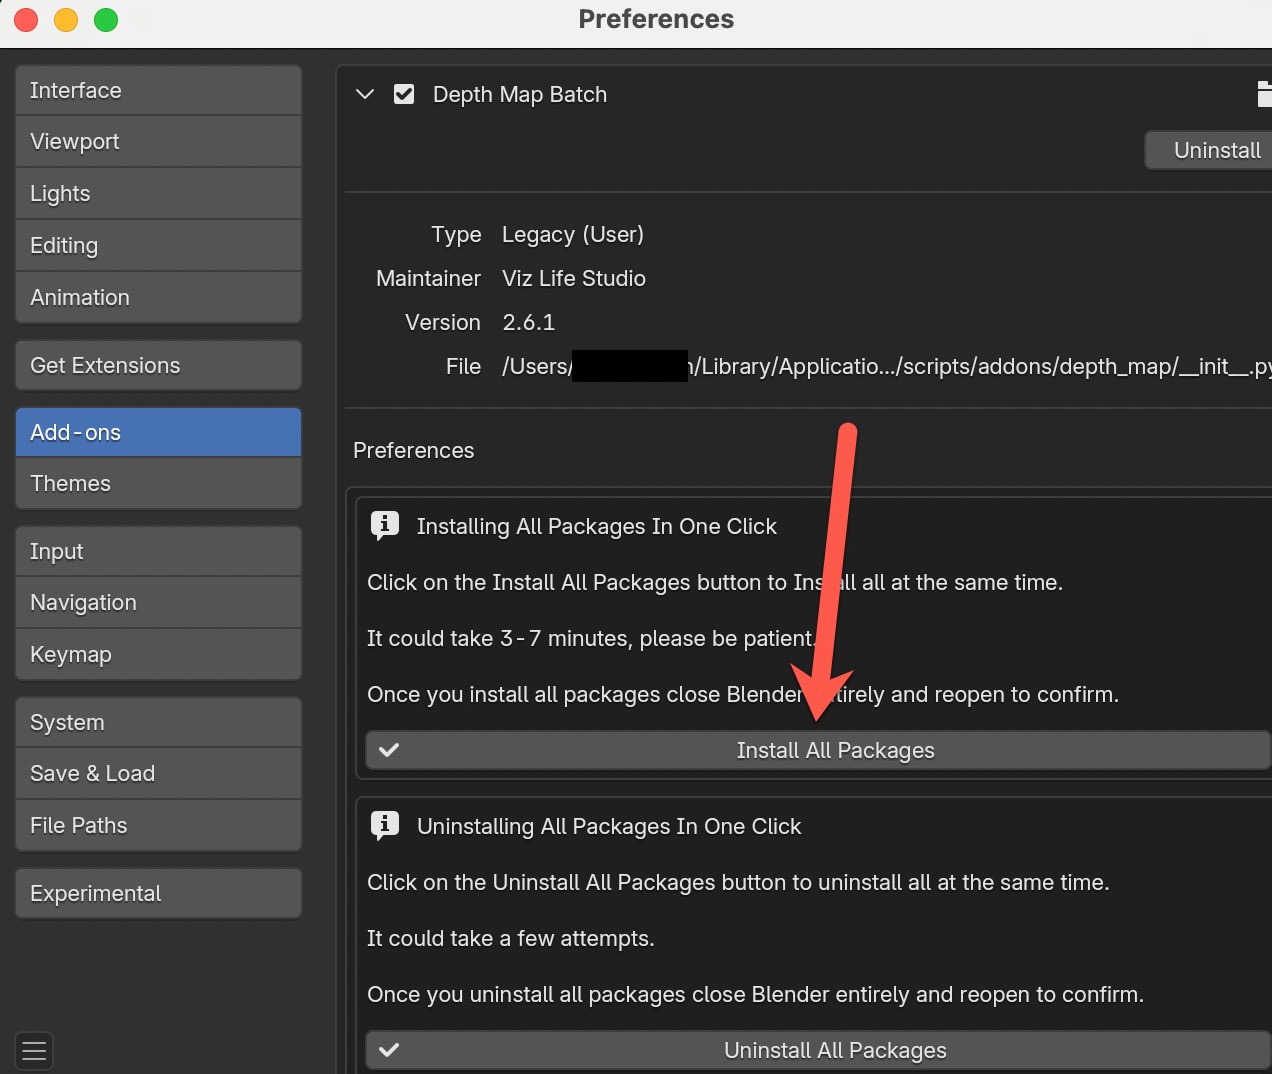
Now, expand out the add-on for Depth Map Batch and find the button that says "Install All Packages". This will allow you to install all dependency libraries in one click. Please give it some time as it could take 3-5 minutes depending on your machine and internet connection.
Close Out Blender Entirely and Reopen
Once you've installed all the library packages, close out Blender entirely so that Blender can recognize you have all the libraries ready to go. The add-on will not show up in the side panel unless all required libraries are installed first.
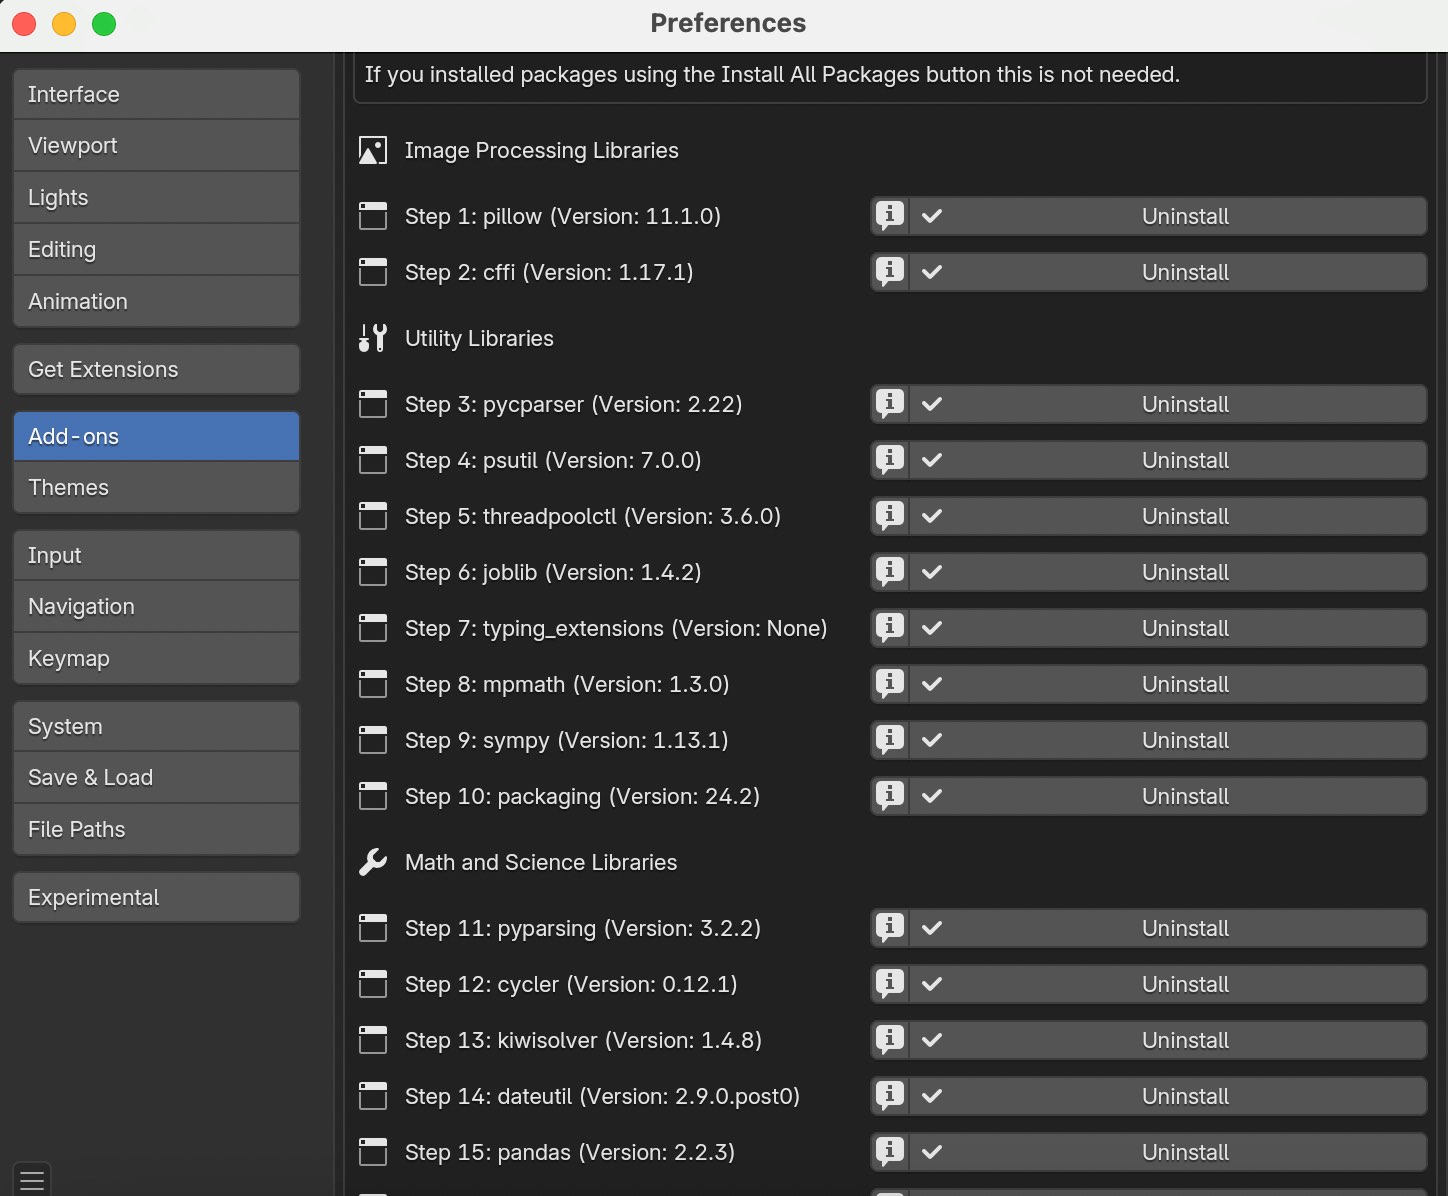
You can always verify if all packages are installed by going into the add-on in the Preferences window and scrolling down to confirm all libraries say "Uninstall".
Install GPU Packages
GPU Support is Optional If you prefer to keep using CPU only, nothing changes—you’re not required to install GPU support for any future updates. This ensures stability for all users while giving you the flexibility to choose.
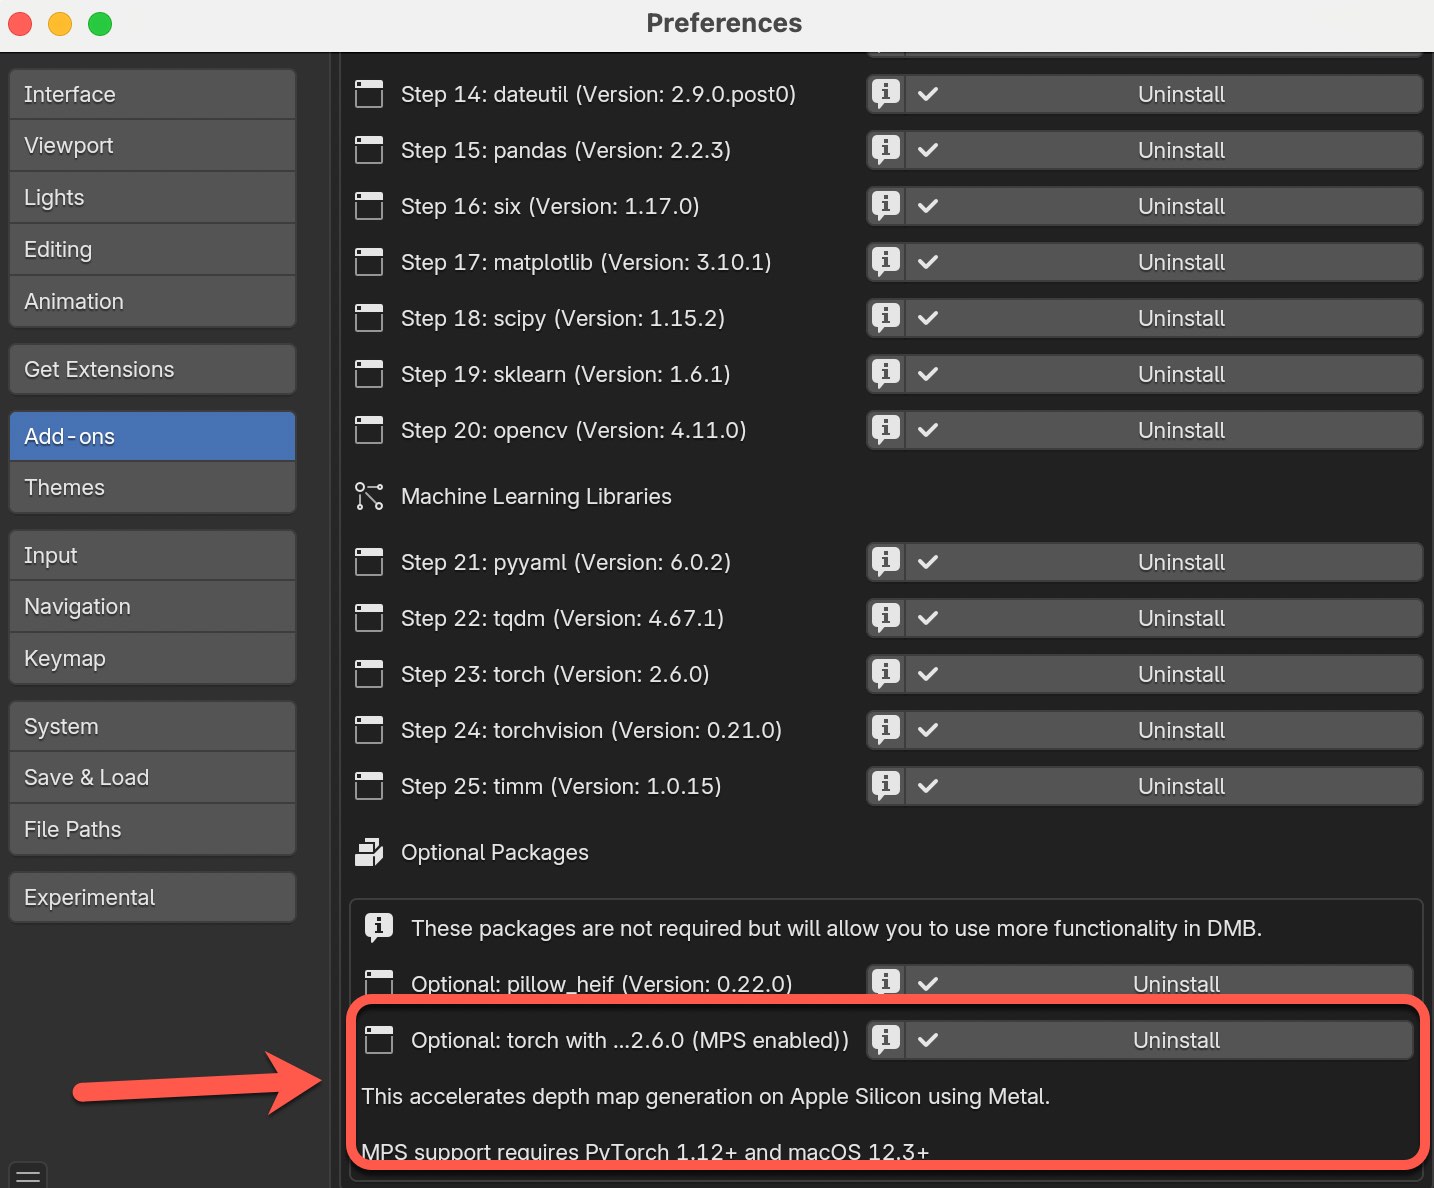
Scroll to the bottom of the Preferences window → Optional Packages section.
You’ll see a new option: "Optional torch with CUDA" (for NVIDIA GPUs) "Optional torch with MPS" (for Mac GPUs)
If everything is set, the button will say "Uninstall"; otherwise, click "Install" to enable GPU support.
Make sure to close out Blender and reopen before checking if the installation was successful.
Uninstall Add-on
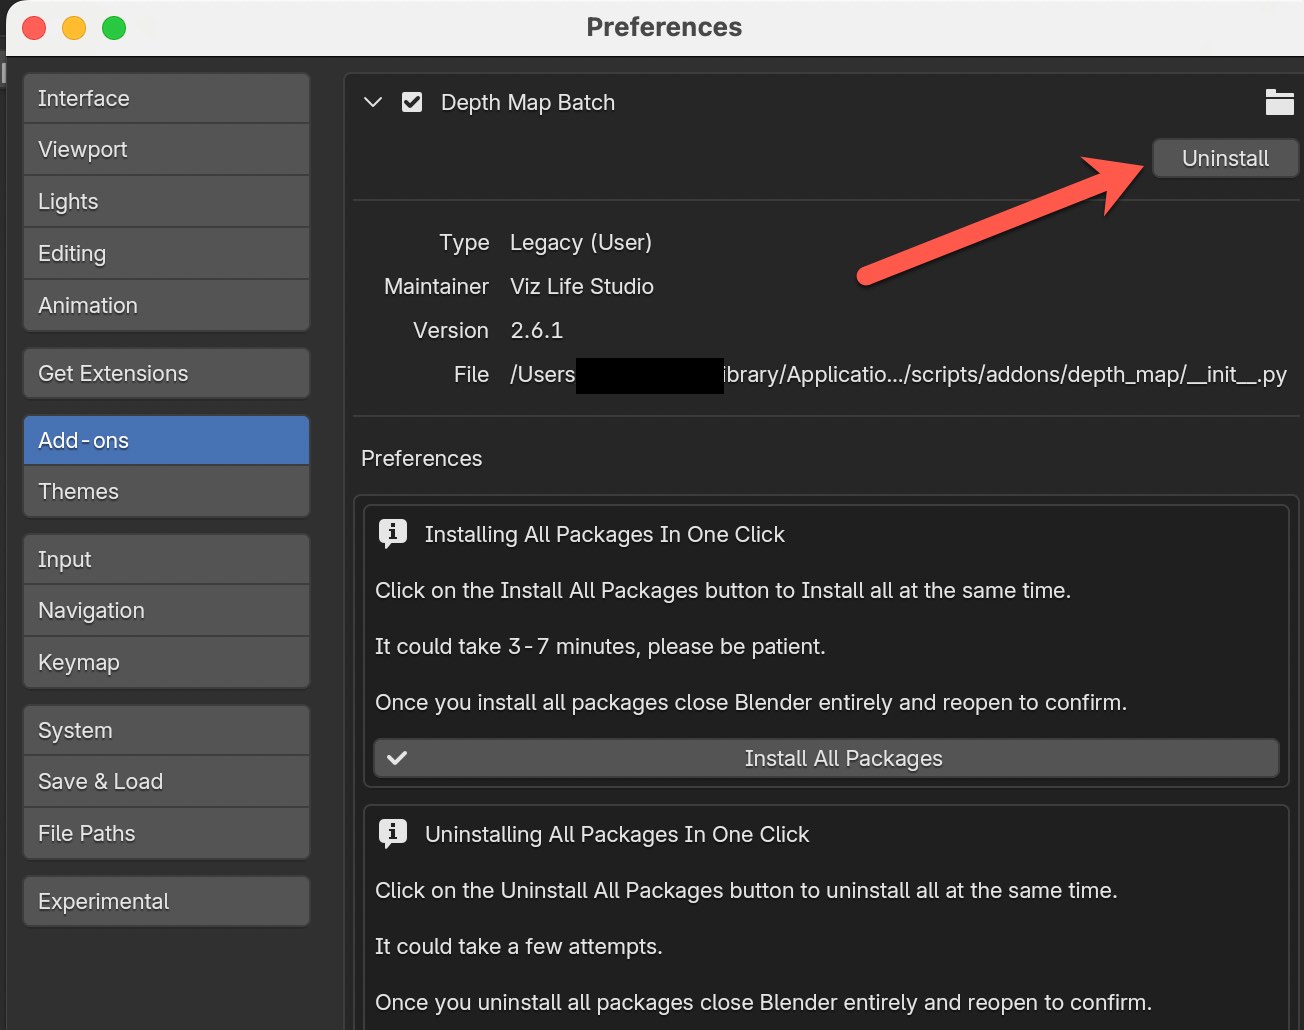
Follow these steps to uninstall Depth Map Batch:
- Open Blender 4.3.
- Go to Edit > Preferences.
- Select the Add-ons tab.
- Locate zForm in the list (you can use the search bar to search for "zForm").
- Uncheck the box next to the addon’s name to disable it.
- (Optional) Click Remove if available to uninstall the addon completely.
- Click Save Preferences to confirm the changes.
IMPORTANT: You don't need to uninstall the Python library packages each time you upgrade to a new version of Depth Map Batch. They can be left as is. All you need to do is uninstall the actual add-on itself.
Upgrading to new version of DMB
If you'd like to upgrade to a new version of Depth Map Batch, make sure to first uninstall the old version and close out Blender entirely after. Then re-open Blender and install the new version.
IMPORTANT: You don't need to uninstall python library packages, only uinstalling the actual add-on itself. Also, if you want to use GPU please follow the instructions here.
User Interface
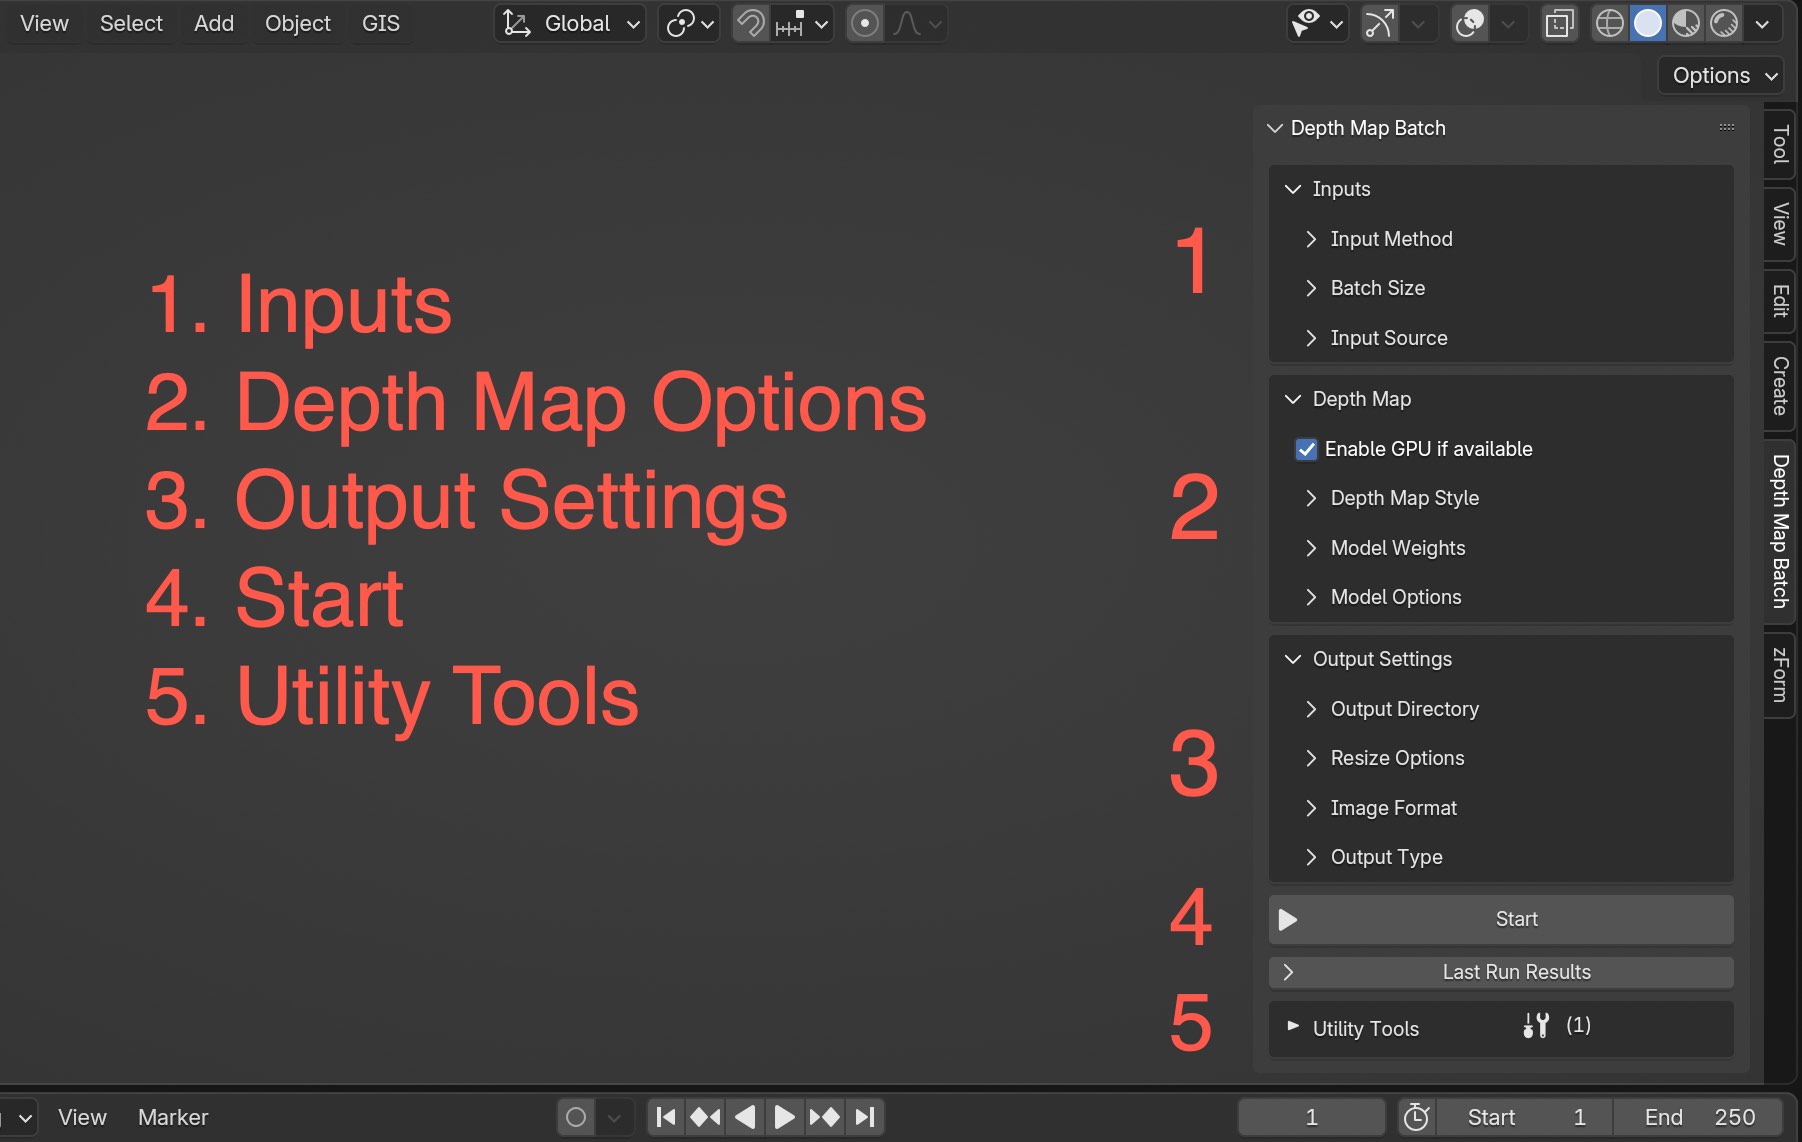
There are five main sections in Depth Map Batch including Inputs, Depth Map, Output Settings, Start, and Utility Tools. There is also another section called Last Run Results, but that isn't critical.
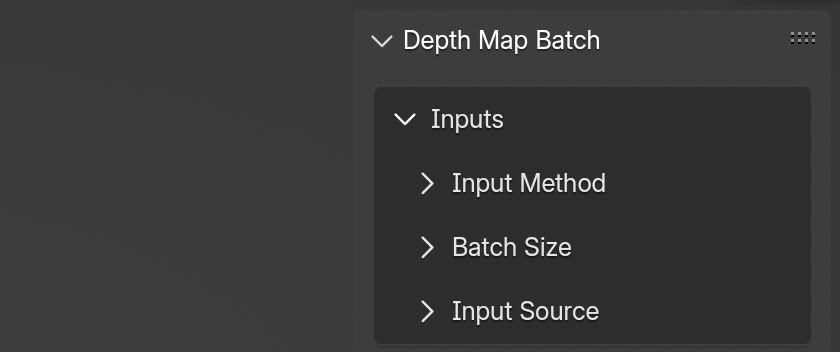
Inputs
Inputs is where you will specify what type of inputs you're providing to produce depth maps, whether it be a single image, video, or a directory of images.
Input Method
There are three options for Input Method including Single Image, Video, and Directory. Currently it defaults to Directory if you don't specify. Currently only PNG, JPG, and JPEG are accepted image formats.

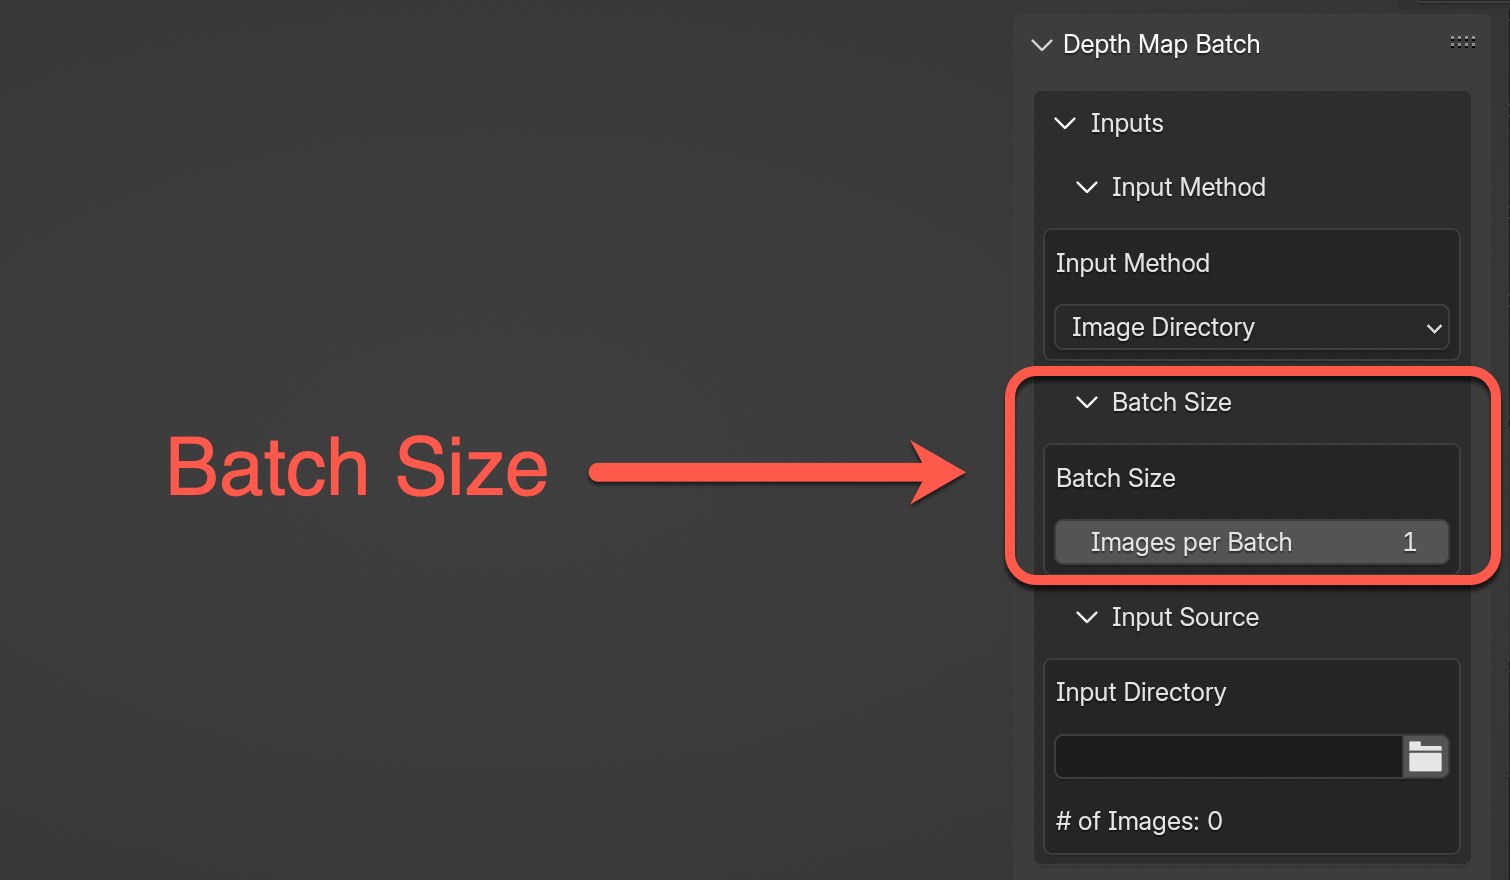
Batch Size
Batch Size gives you the ability to increase how many parallel processes you want to run at one time to generate depth maps. This is always defaulted to 1, but if you have a powerful machine you could experiment increasing the batch size higher. Increasing the batch size makes it more difficult to stop processes early.
I wouldn't recommend going higher than 3-5 unless you've got a top tier machine. And increasing the batch size doesn't always mean it will produce faster....there needs to be a balance that you'll need to experiment for yourself.
In my workflow I almost always leave to 1.
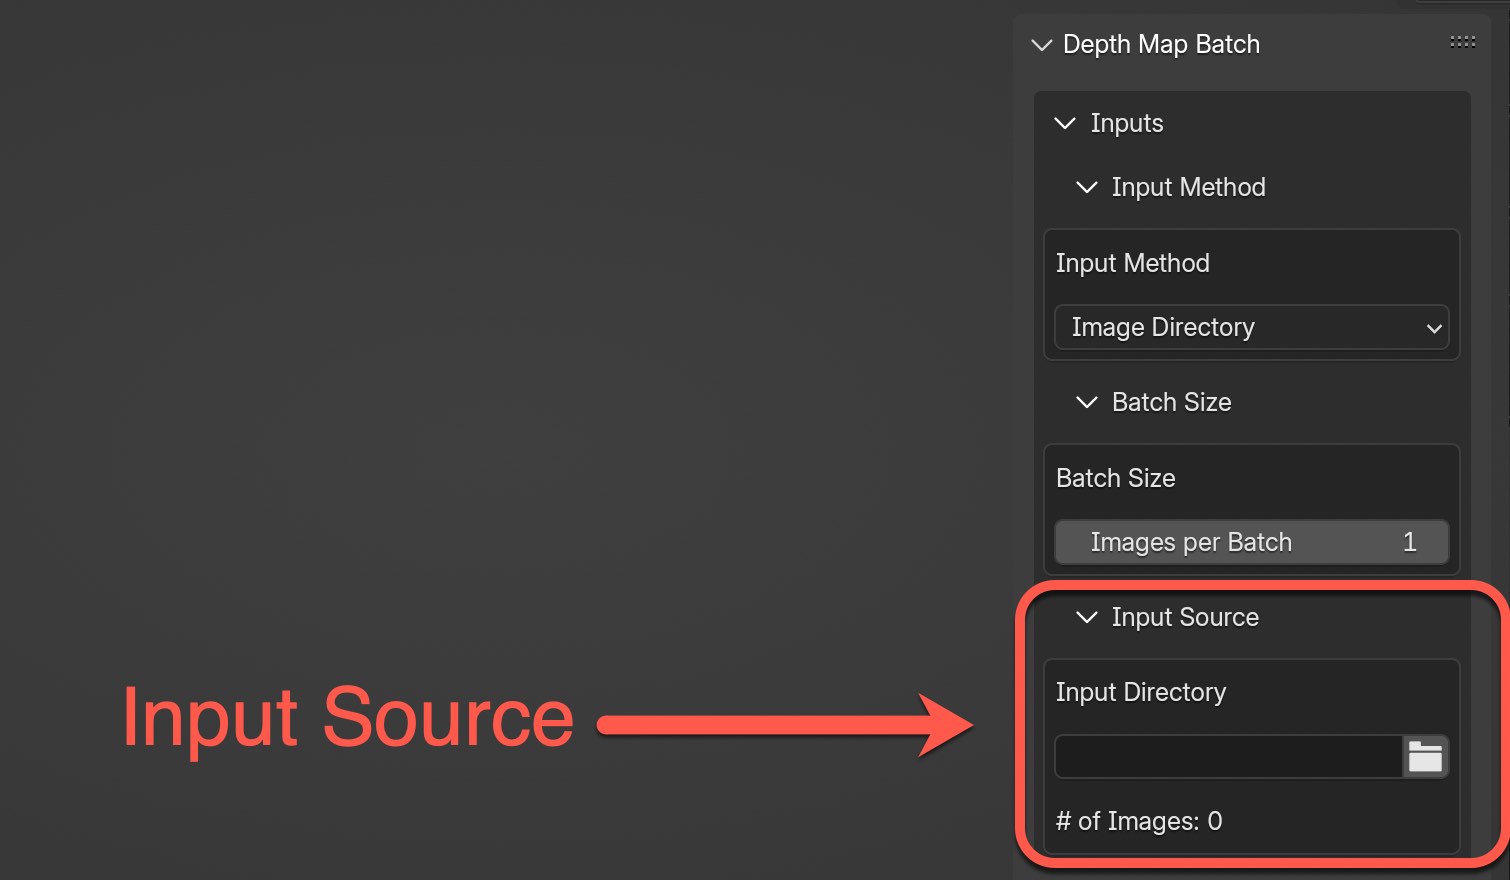
Input Source
The Input Source is the actual image, video, or directory that will be used to generate depth maps for. Make sure if you're using an image or video to double click on the file just in case.
Depth Map Options

Enable GPU
By default, GPU is enabled which means if your machine is set up correctly to generate depth maps levaraging GPU performance, it will do so. But, if your machine doesn't have the necesseary python packages to run GPU, even if your machine has GPU, it will revert back to using CPU.
For those that don't have GPU machines it will just use CPU and there's nothing you need to adjust here.
IMPORTANT: If your machine is set up to use GPU, but you prefer CPU, make sure to uncheck this option before running Depth Map Batch for the first time in an opened file.
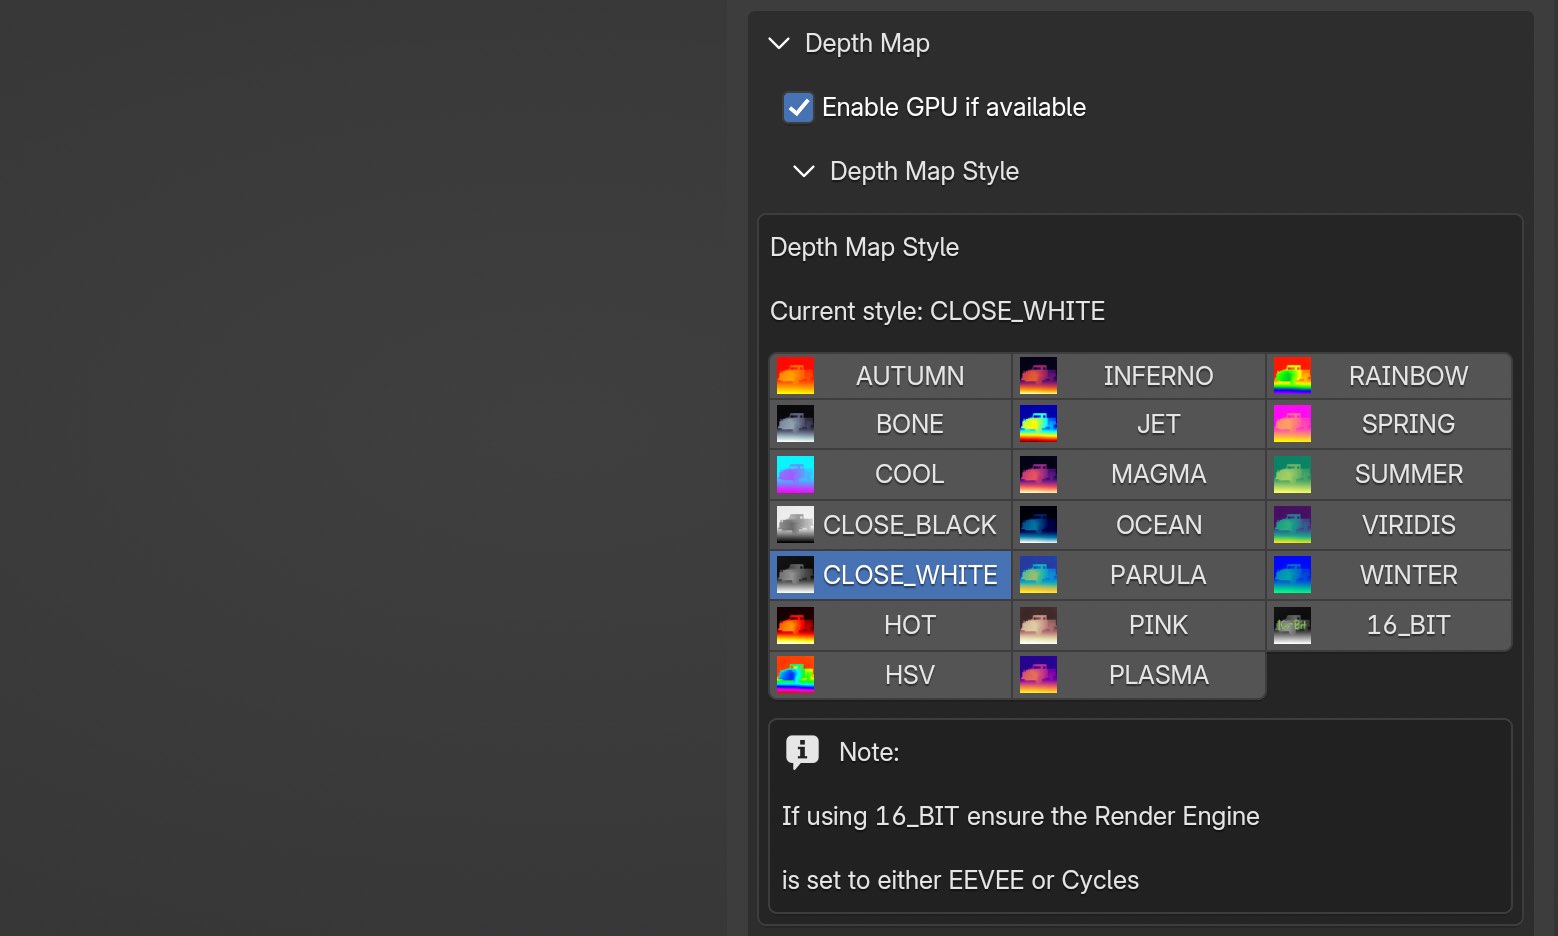
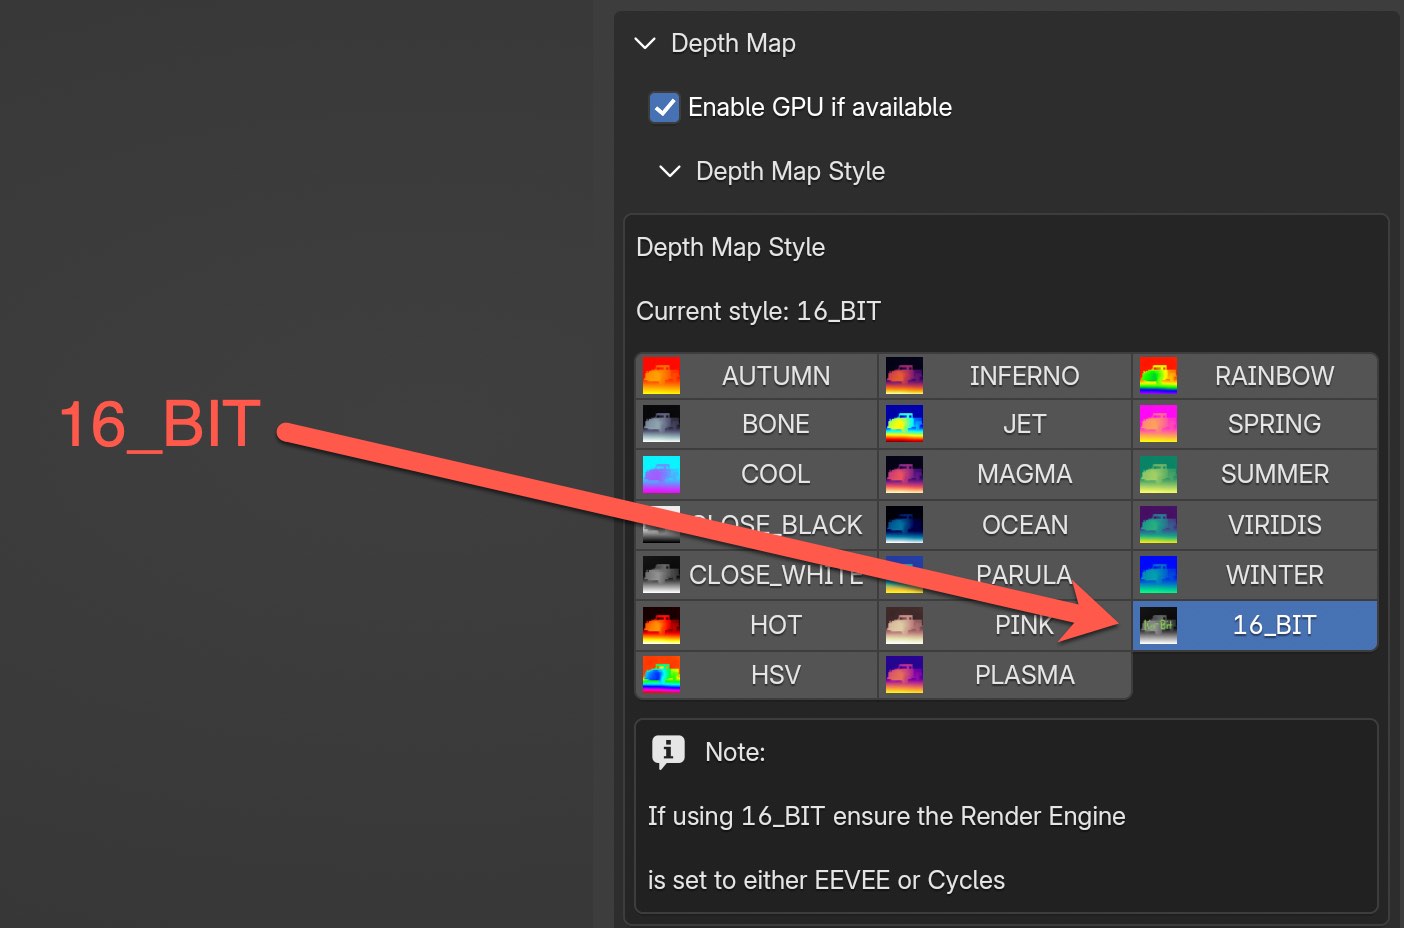
Depth Map Style
There are twenty different depth map styles, three of which are pure grayscale including CLOSE_WHITE, 16_BIT, and CLOSE_BLACK.
Most of the time I will use either CLOSE_WHITE or 16_BIT. But on occasion I might use one of the other color depth map styles for aesthetic purposes to visually show what depth maps look like, or to control RGB colors in texture properties of a displacement map.
I rarely use CLOSE_BLACK, but it's there for those that prefer that objects closest to the camera view are black and those furthest away being white.
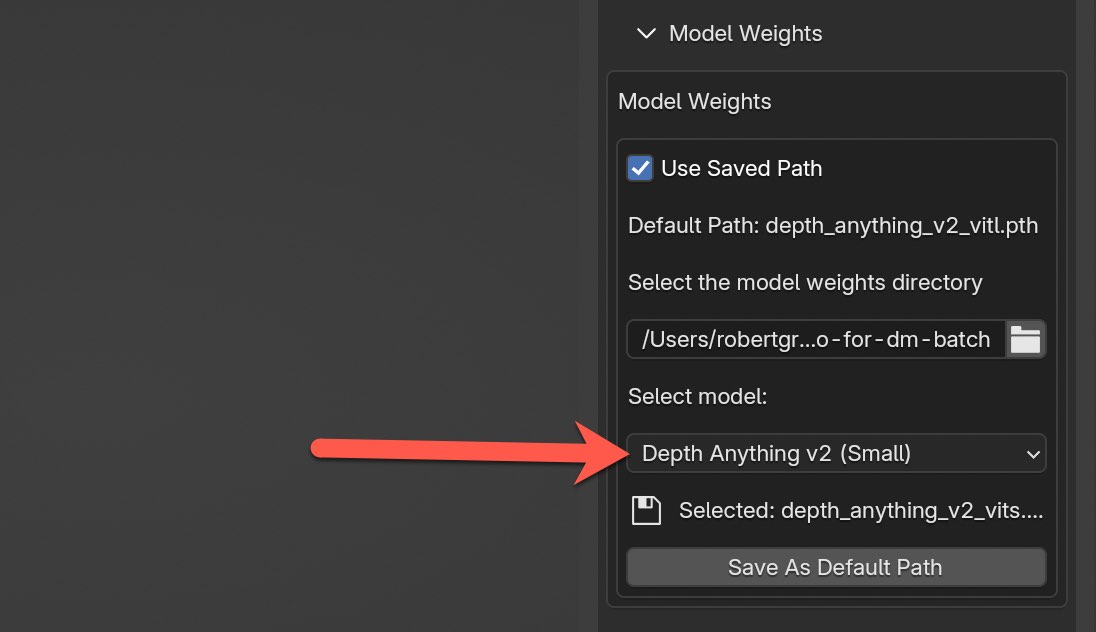
Model Weights
A critical section. The directory path you choose in this option is where you've placed all of your model weights files. I recommend saving the model weights files in a directory that's easy to remember for future reference.
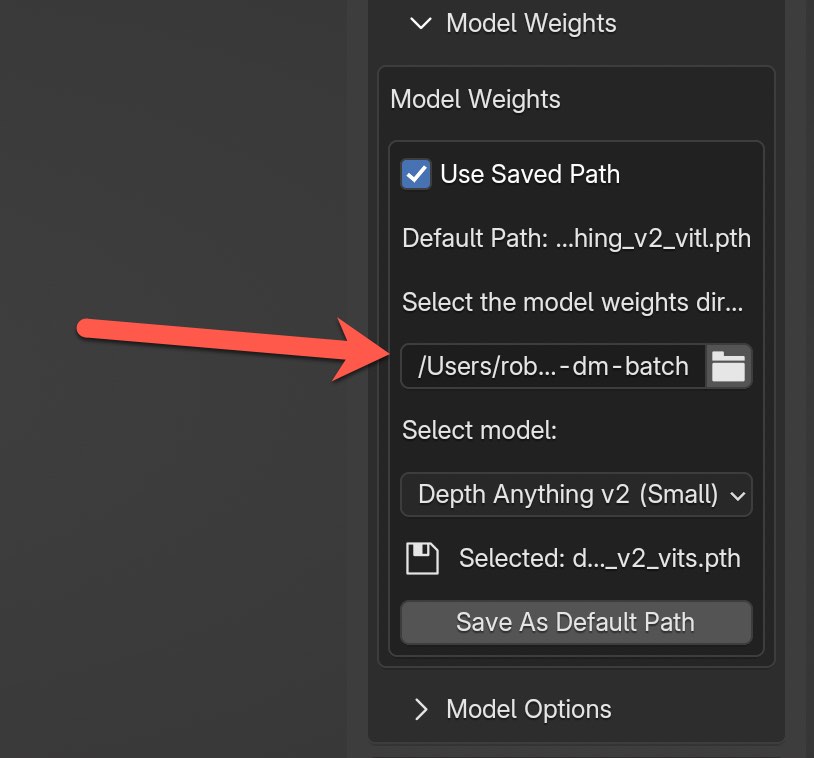
Then, once you've specified the directory you can choose which model to use in the dropdown. The only model options displayed are those that you've got model weights files in the directory.
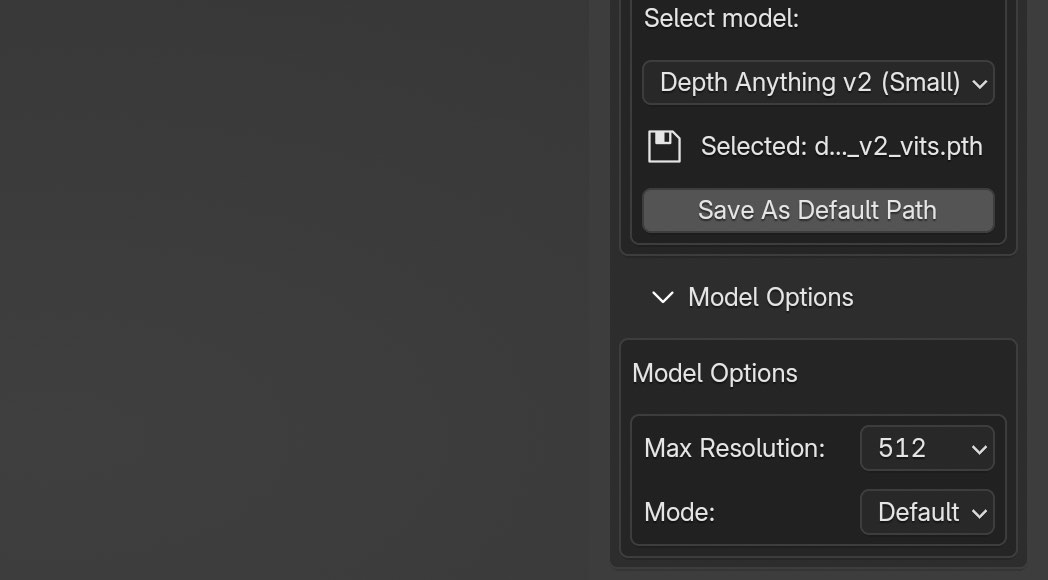
Model Options
The Model Options section is only used for Depth Anything V2 models to specify the Max Resolution size you want to use for the image being passed into the model. The larger the resolution size the longer it takes, but will typically also produce better quality depth maps.
Max resolution options go from 256 up to 1600 depending on if your machine can handle it.
I rarely go above 1200. If I'm generating depth maps for a sequence of frames for a video that might be 200-500 frames, I will use lower max resolution sizes because of the time it takes to generate depth maps.
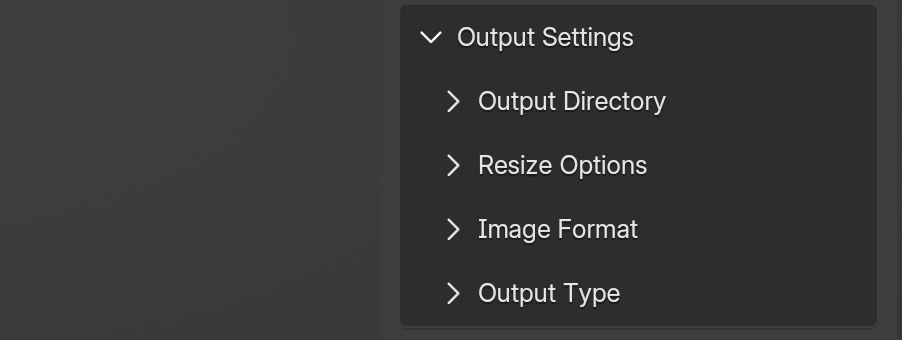
Output Settings
Output Directory
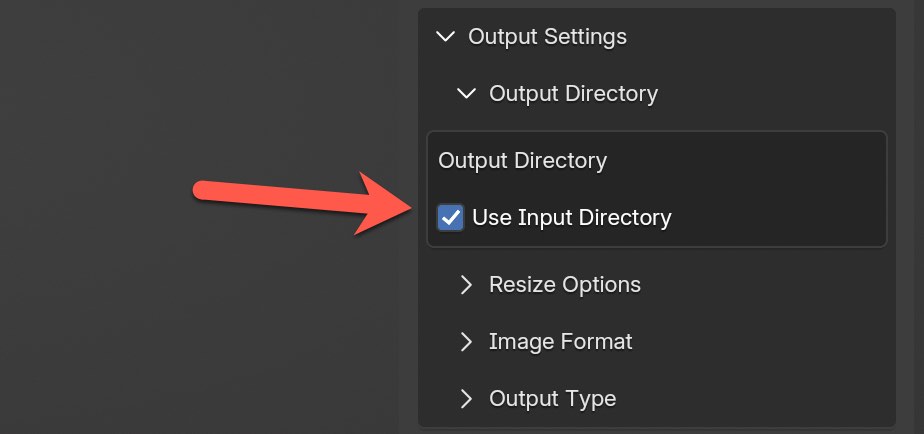
The Output Directory section is where to save the depth maps.
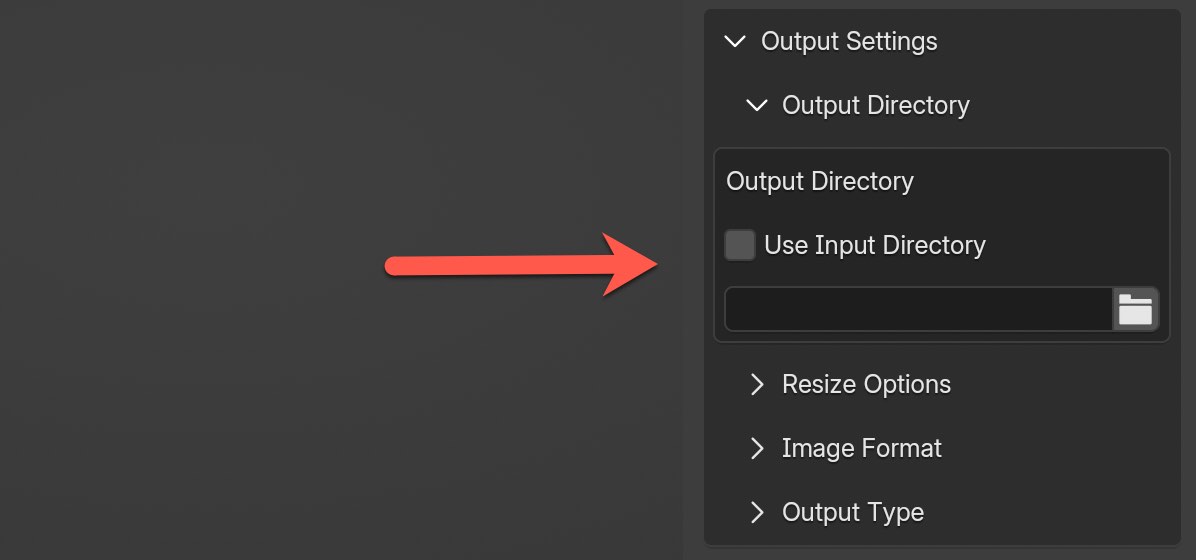
If you would like to save depth maps in the same location as the input directory, just enable the Use Input Directory option.
Resize Options
By default, the image size is set to be the same dimensions as the original input files. At any time you can adjust relative or absolute size.
IMPORTANT: 16-bit depth map generations are only possible when you maintain the original image sizes of input files.
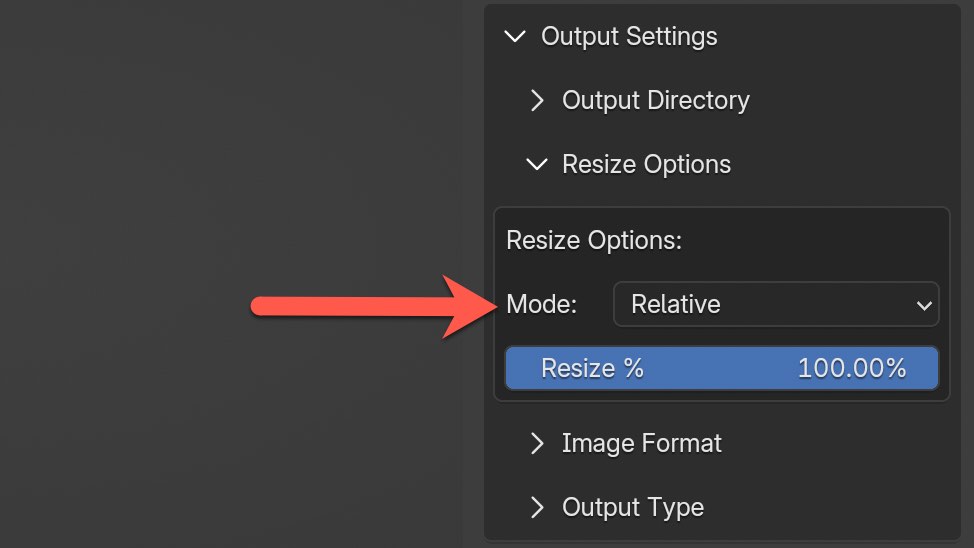
Image Format
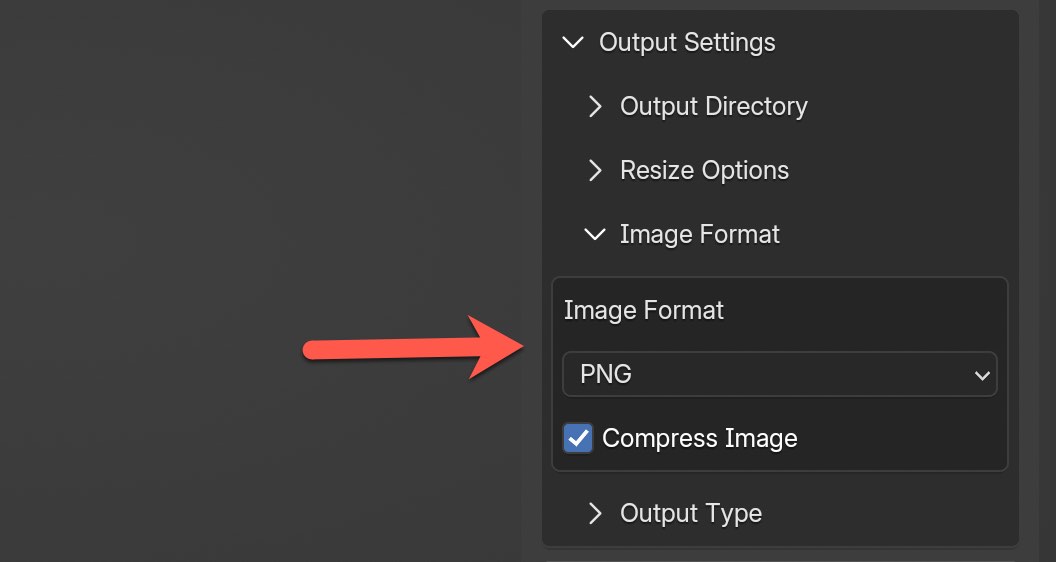
By default, the image format is PNG for depth map generations to keep the highest quality. But you also have the option to choose JPG, or instead generate both PNG and JPG.
Output Type
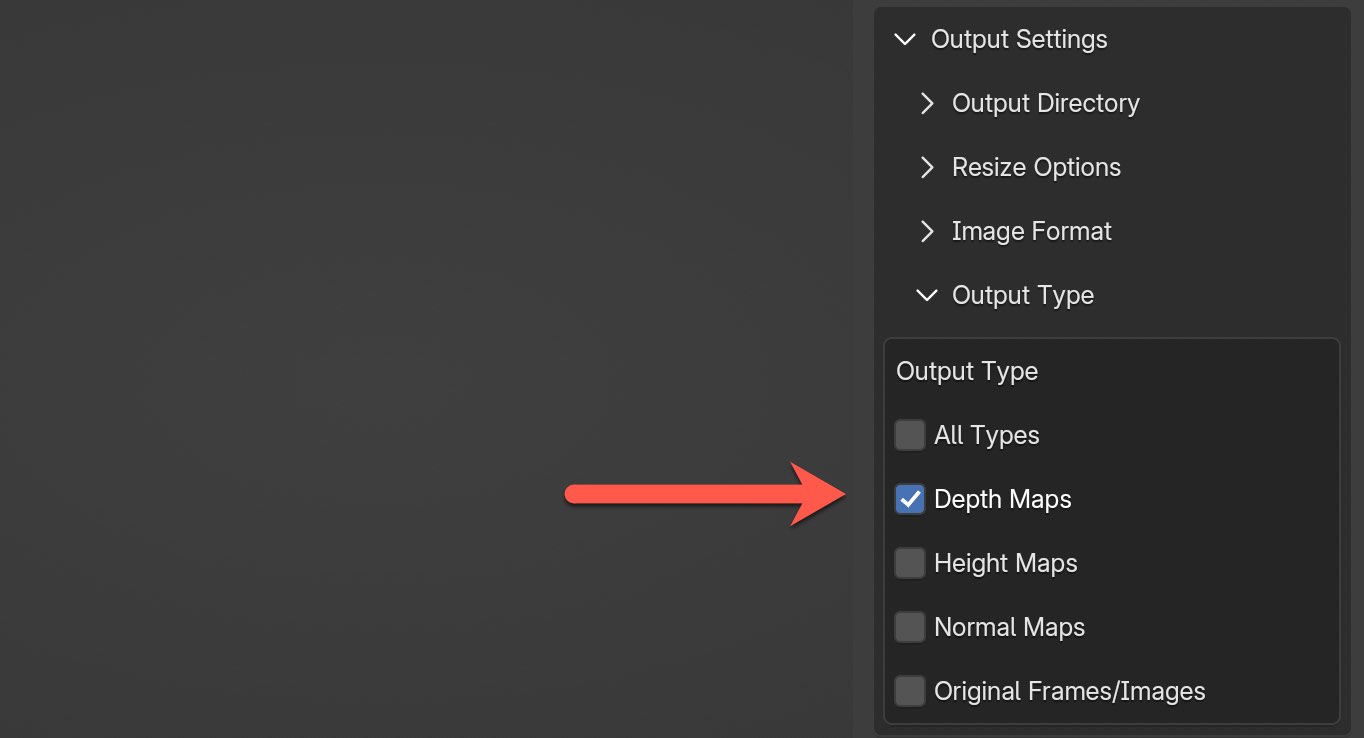
By default, the only option selected in Output Type is Depth Maps, but there are many other options. If you choose All Types it will generate and save images for all types listed.
If you only want to produce height maps or normal maps based on the original input files that's an option as well. The Original Frames/Images will extract individual frames of a video file.
Start
The last step is clicking the Start button. Once that's clicked on the entire process will start and you'll be able to monitor progress.

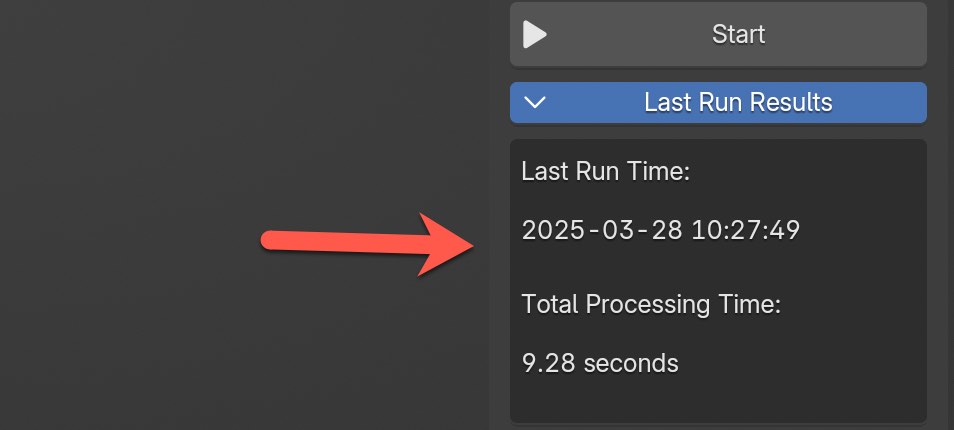
Last Run Results
If you want to view stats on the last process run time expand out this section.
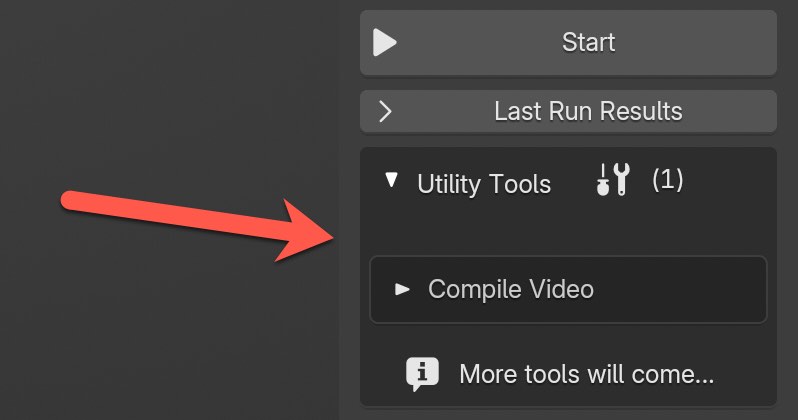
Utility Tools
In the Utility Tools section, all tools are independent of what's being processed for depth maps. These are tools purely to help with workflows. At the moment there is only one tool to compile a directory of images in a directory, like a sequence of frames of a video, into an actual .mp4 file.
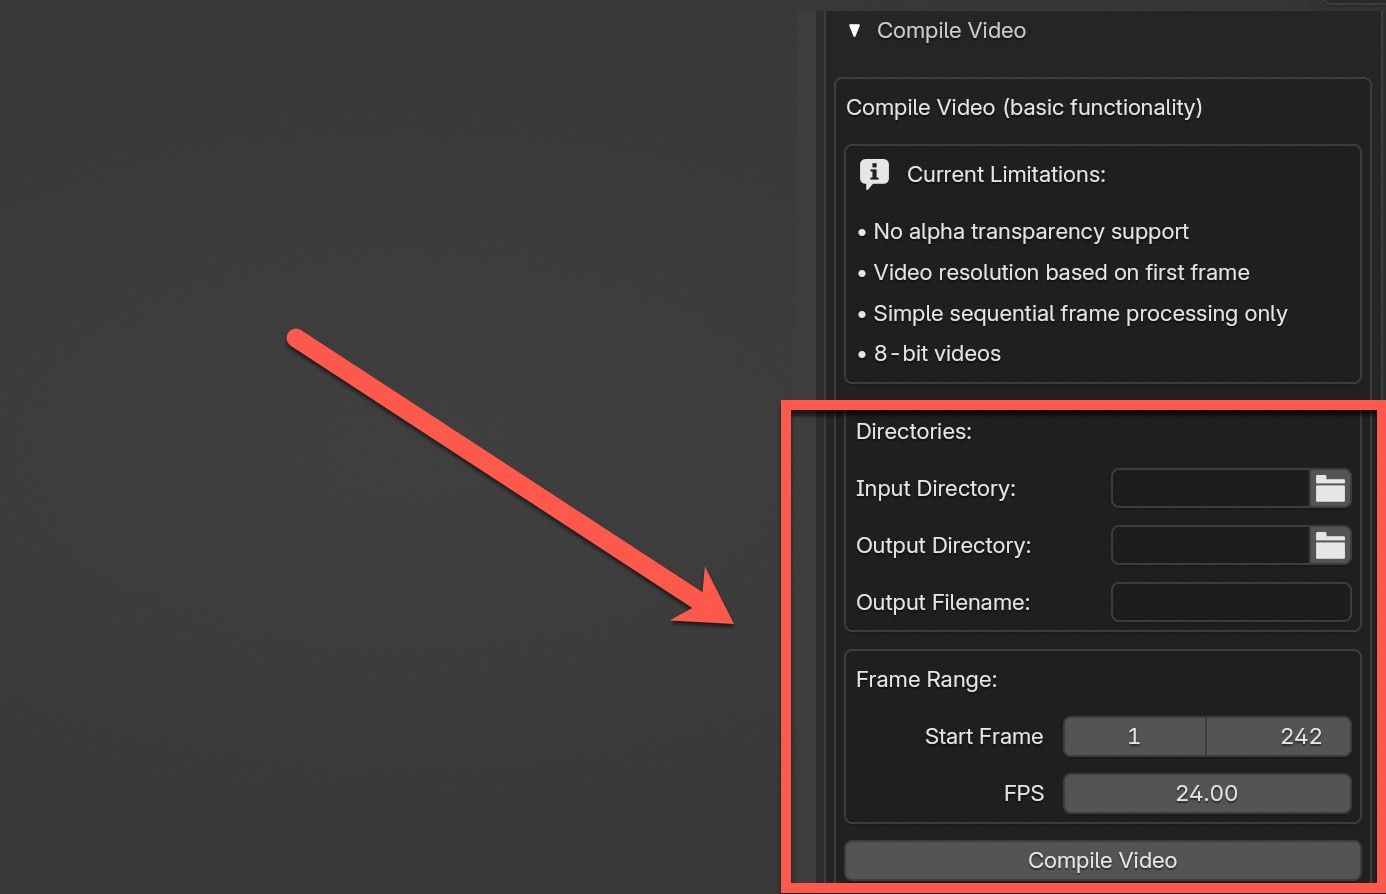
Compile Video
Steps are pretty straightforward.
- Specify the directory where all the images are located
- Specify the output directory where to save the .mp4 file
- Name the file in Output Filename section
- Click on Compile Video
FAQ and Tips
How to use 16-bit
To generate 16-bit depth maps you need to ensure two things, one is choosinge one of the Depth Anything V2 model weights options, and the other is selecting the 16_BIT depth map style.
What are the benefits and drawbacks of using 16-bit?
One of the most unique features for DMB is the ability to generate 16-bit depth maps for 8-bit images, which is difficult to find as a feature in other tools or platforms out there. The biggest benefit of using 16-bit depth maps is the ability to minimize unwanted banding that can occur in 8-bit depth maps as well as be capable of handling higher Subdivision Levels in the mesh to produce more detail without unwanted artifacts.
This can be beneficial for use-cases like 3D printing or for more accurate camera lighting effects.
There is one drawback that I've experienced though, which is the true depth isn't as good as 8-bit typically.
GPU - How can I generate depth maps using GPU instead of CPU?
Scroll to the bottom of the Preferences window → Optional Packages section.
You’ll see a new option: "Optional torch with CUDA" (for NVIDIA GPUs) "Optional torch with MPS" (for Mac GPUs)
If everything is set, the button will say "Uninstall"; otherwise, click "Install" to enable GPU support.
Make sure to close out Blender and reopen before checking if the installation was successful.
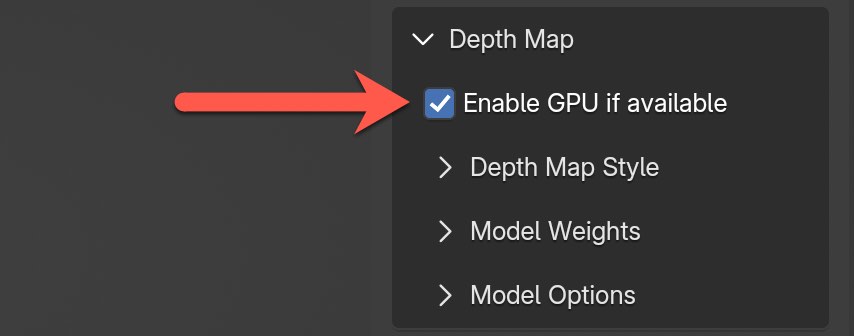
Then, make sure you have the "Enable GPU if available" is check on.
Why don't I see DMB show up in the side-panel menu?
The add-on will only show up in the side-panel if all necessary library packages are installed, otherwise you will only be able to see the add-on in the Preferences window. It's very possible you didn't close out Blender entirely after installing the packages for the first time, which is important. Otherwise it won't show for the first time in the side-panel until that very first time of closing and reopening Blender.
The other possible reason could be you don't have all the libraries installed. Maybe you have most or almost all of them. Even if only one isn't installed, the addon will not show up in the side-panel.
What types of image formats can I use to generate depth maps?
At this time PNG, JPG, and JPEG
Saving and Working with Existings Project Files
I discovered that the “Relative Paths” setting in Blender’s Preferences was causing problems when reusing saved projects. To fix this, please uncheck "Relative Paths" in the Save and Load window in Preferences.
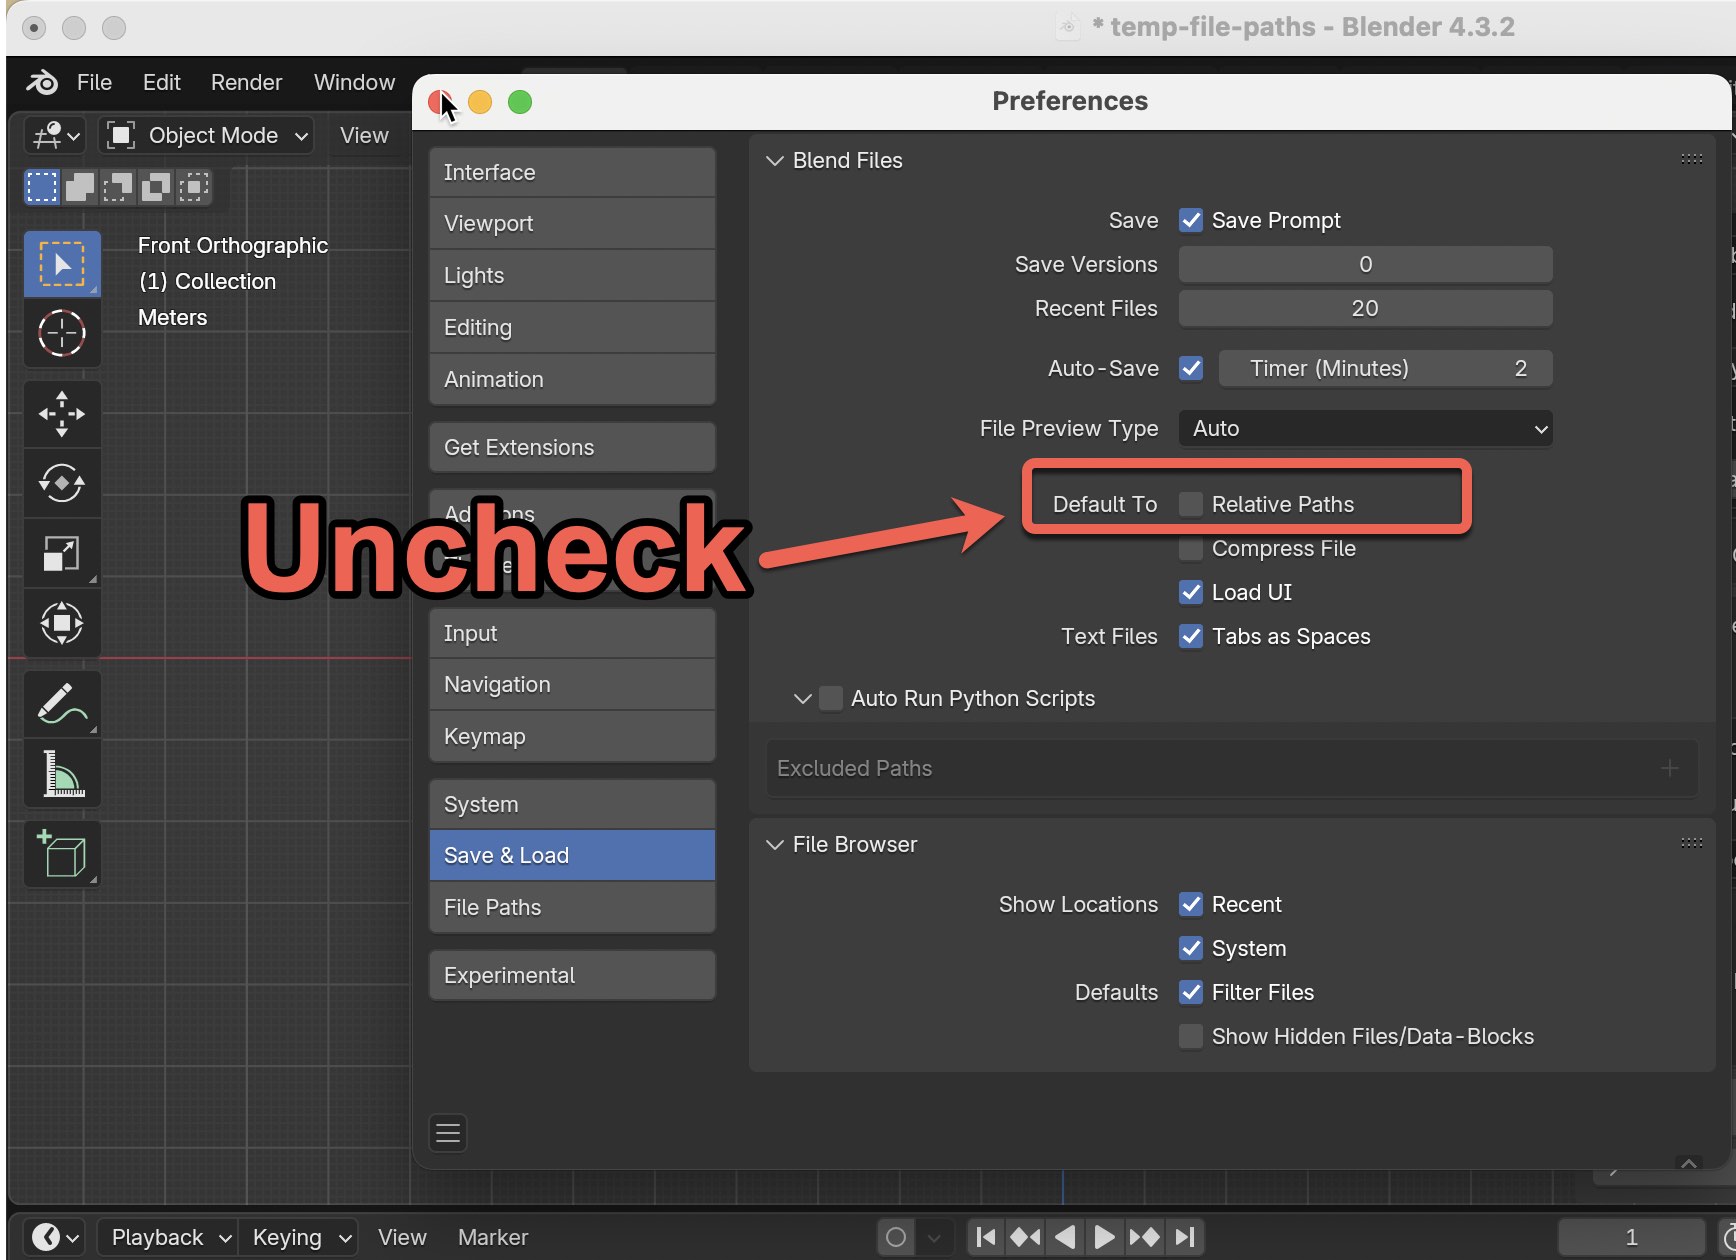
You can follow these steps:
- Open Blender and go to Edit → Preferences.
- In the Preferences window, navigate to the Save And Load section.
- Uncheck the "Relative Paths" option in the Default To section.
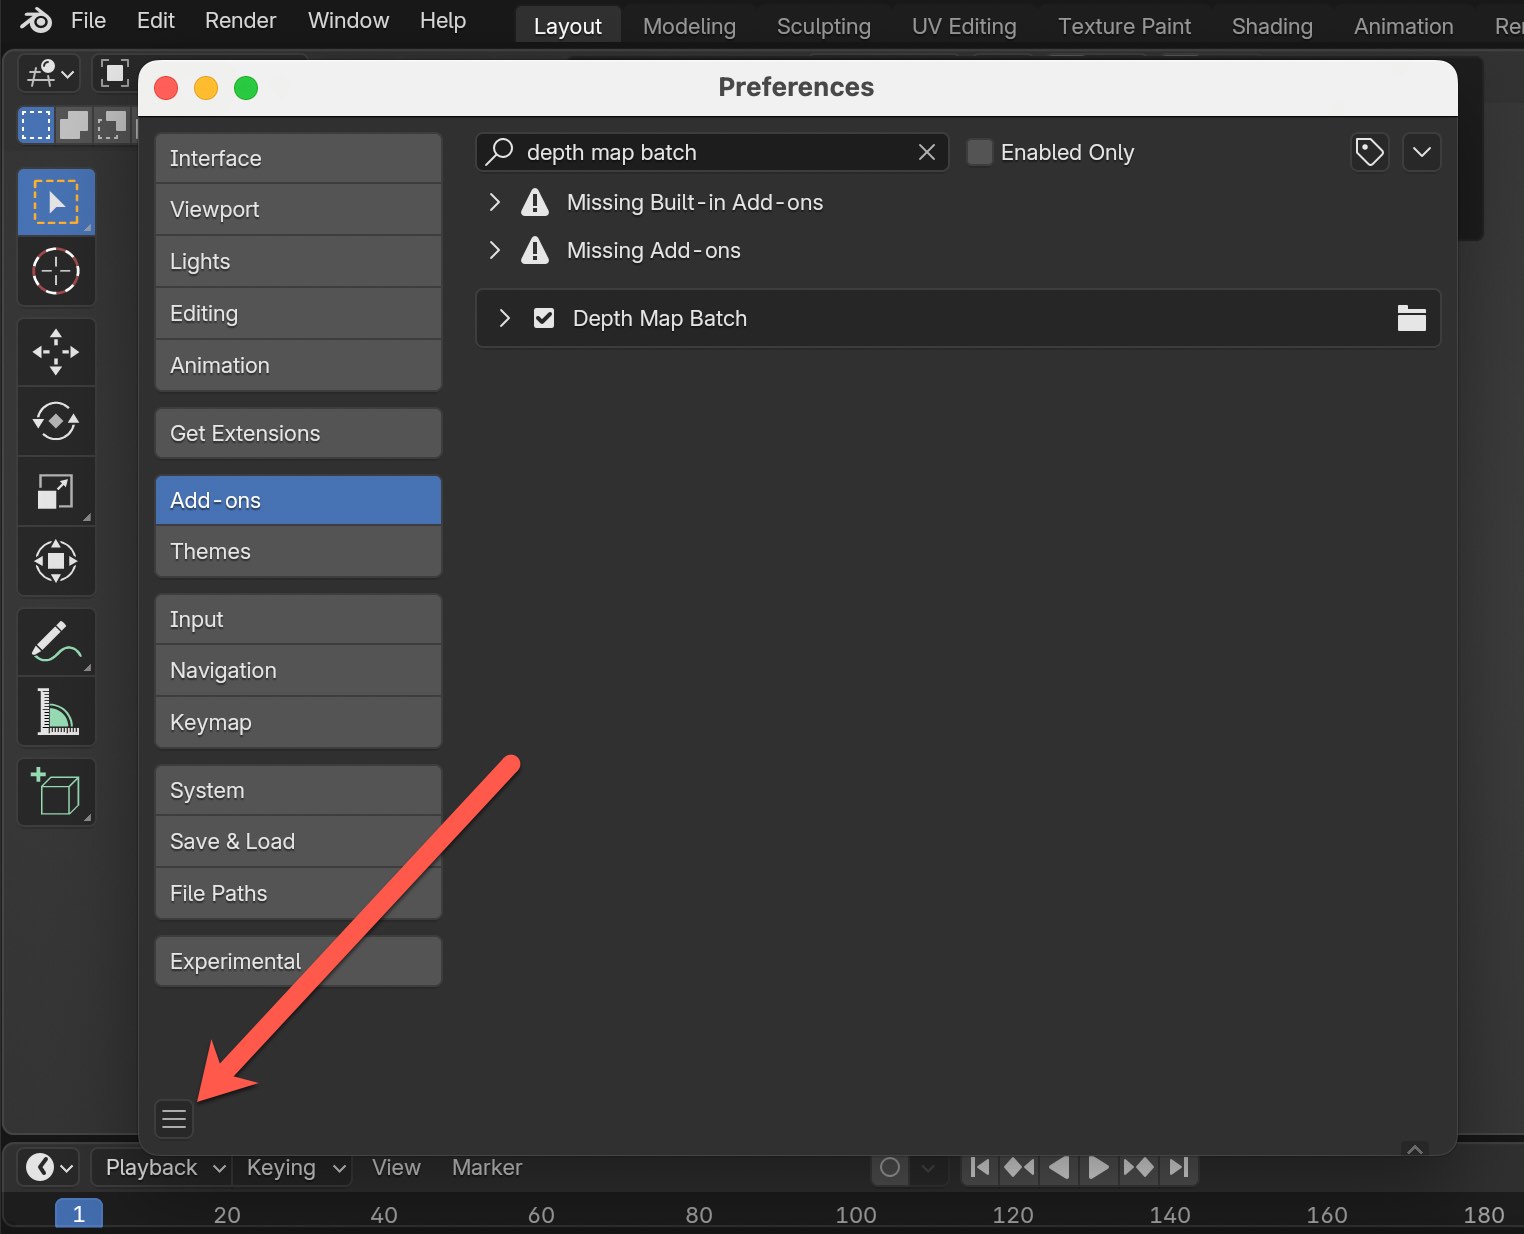
- In the bottom left of the Preferences window, click on the hamburger icon to save your preferences.
- This change will be saved for all future project files. If you ever need to revert to the previous behavior, simply re-check the "Relative Paths" option.
Additional Note for zForm Users: When reopening an older project in zForm, please note that the Mesh View option defaults to top view. You may need to adjust this setting manually.
Newest Updates
Check out all the release and code updates here